
Zocdoc is a marketplace where a lot of Patients book appointments with providers. Currently we do not have an integration with them. This means, when we receive an appointment request, we need to manually add the Patient to our EHR. There are several steps, so be sure to follow them carefully. Remember, you are doing this to help out the team member next to you and set them up for success.
📚Resources Needed
- besa EHR
- Zocdoc
- Insurance Eligibility Check
- LabCorp
- Radnet
- MD Toolbox
🚀 Tips & Tricks
-
If a Patient books an appointment that is not within 48 hours, you will need to manually send them the Patient intake form.
-
We have 24 hours from the Patients booking to get their card on file and all information from them. If not, we will need to cancel the appointment.
- For the insurance eligibility check, there are several different areas we check based on the carrier.
- United Healthcare
- Anthem
- Aetna
- Cigna
- Medicare
- We may also need to call the insurance carrier to get info.
- Make sure to have the 4 webpages listed above open.
- If something with the appointment doesn’t make sense, call the Patient to confirm. Also, if its more of an urgent care type of visit and we can see the Patient sooner, call them to let them know as they may want to do that.
- Here are the main actions your doing:
- Checking appointment details
- Verifying eligibility
- Adding Patient and appointment to EHR
- Adding demographic and insurance details
- Adding to LabCorp
- Adding to Radnet
- Sending chat
- Confirming everything has been added via Zocdoc.
📘 Instructions
Make sure not to forget one of these steps.
- We will receive an email about a new appointment request.
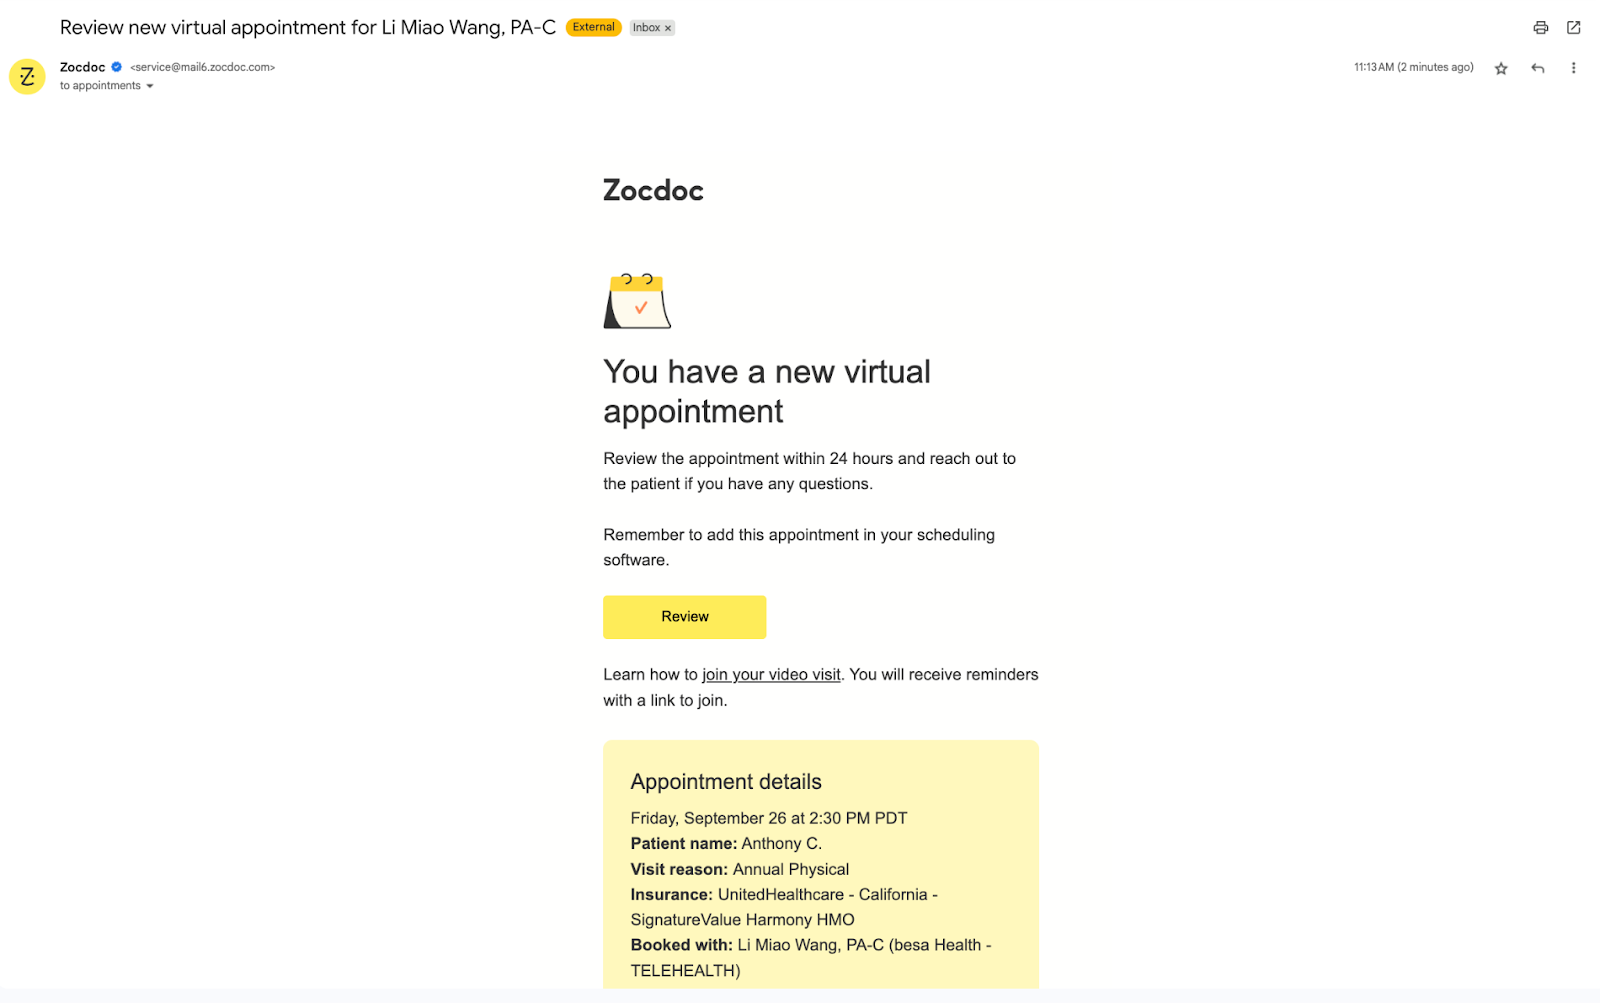
- Login to Zocdoc to confirm information and get it ready to add to the EHR.
-
If the Patient appointment is not within 48 hours, we will need to send them the Patient intake. You will know it needs to be send because it will say Pending Send in the Patient Confirmation area.
You can send it to them by clicking on Request Info > Collect Intake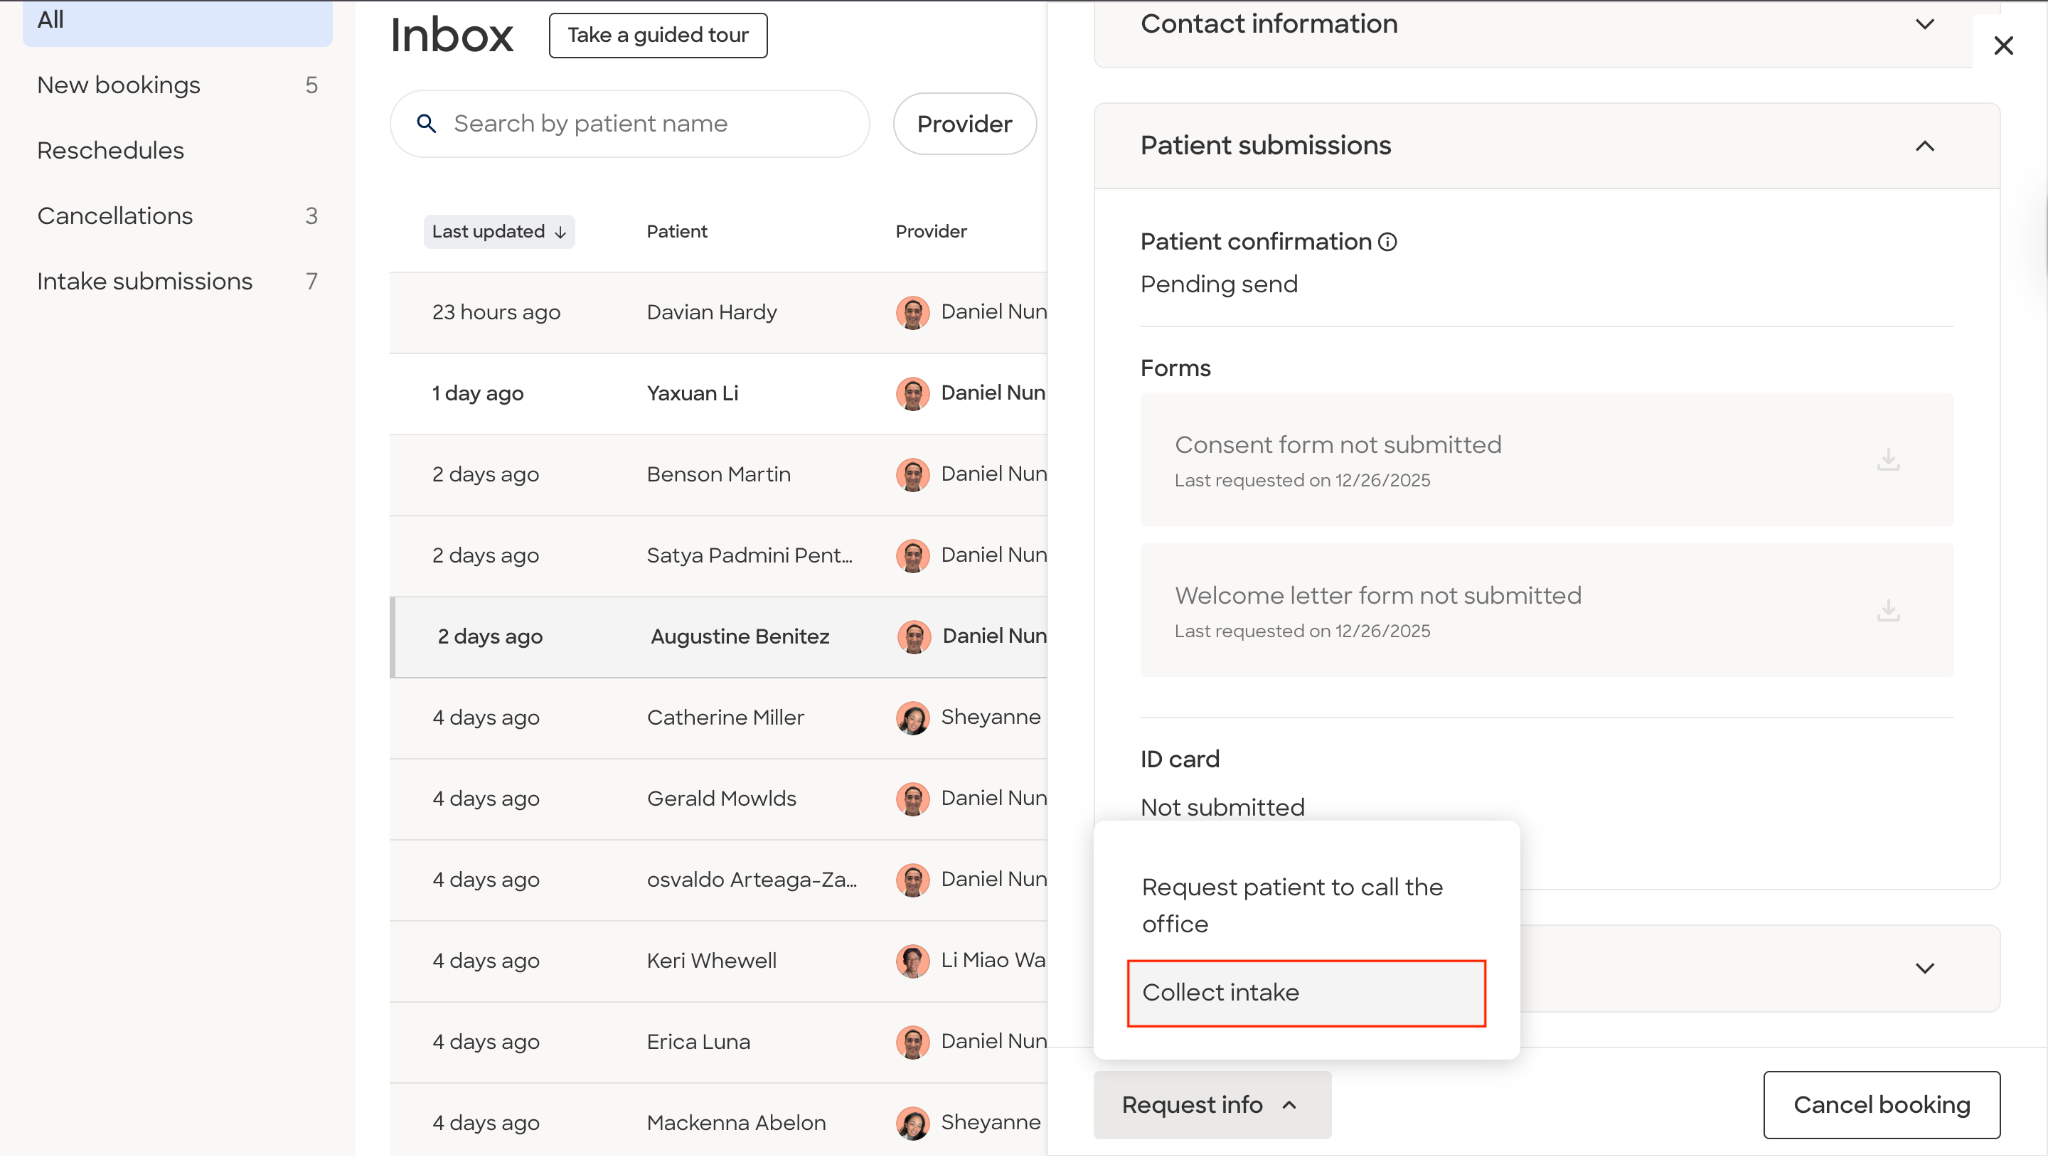
- Download the Insurance, ID, and Consents document.
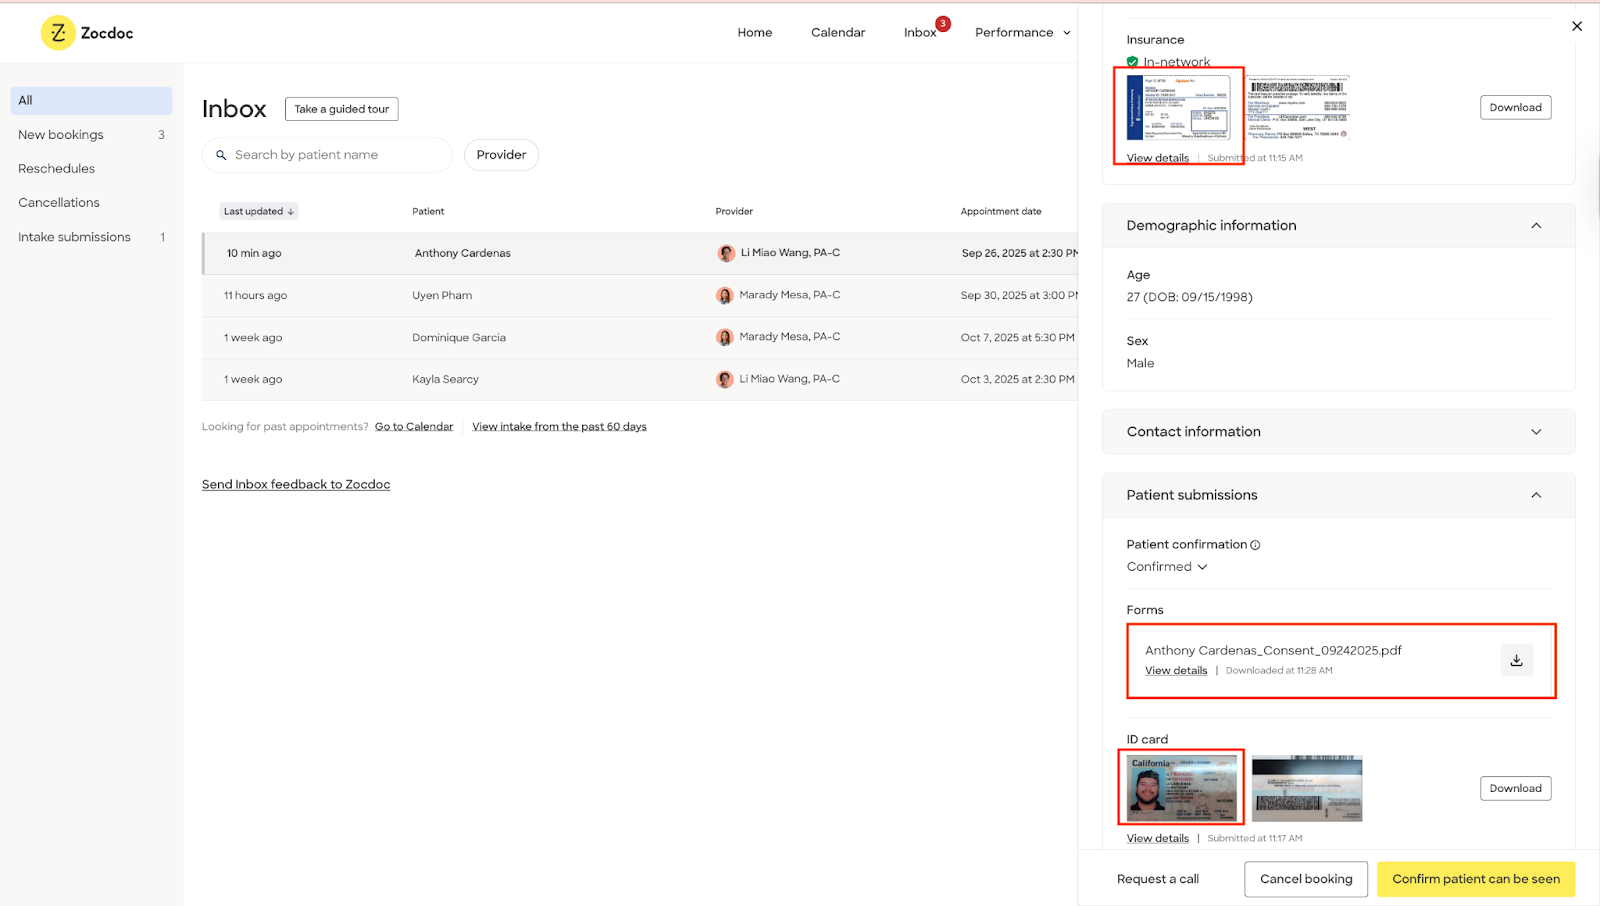
- Get the Insurance ID, DOB, and search their eligibility within the respective insurance carriers portal. You will need to do this to help completing the Patients profile in the EHR and getting the Copay / Deductible.
- Login to the EHR and add the Add the Patient.
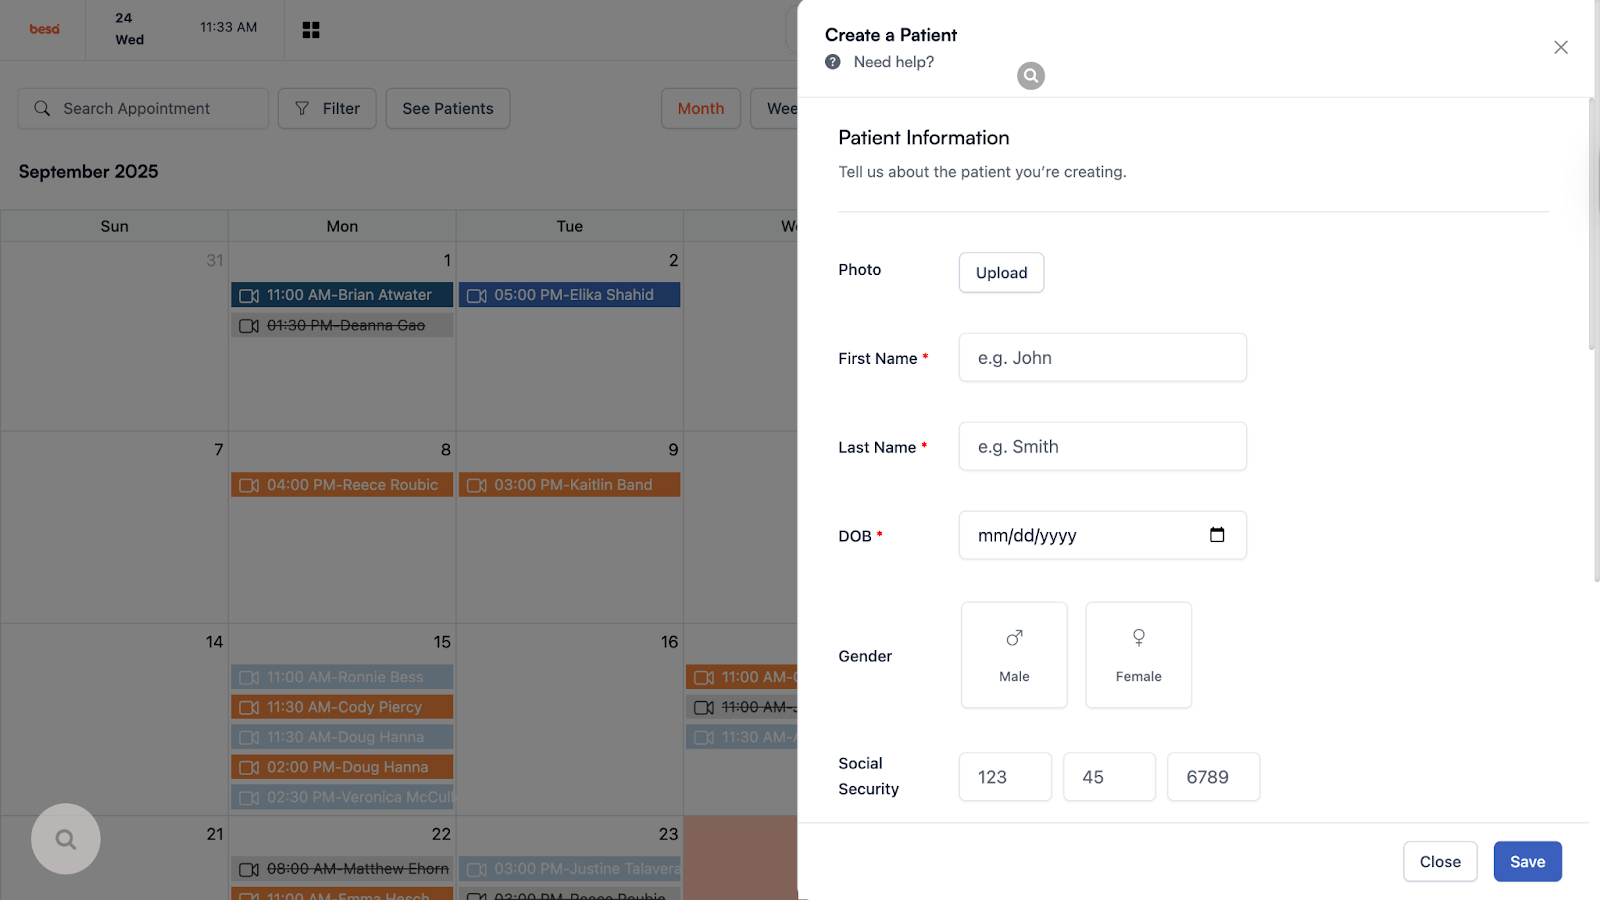
- Using the information we have, you will be able to fill in the following fields:
- First Name
- Last Name
- DOB
- Gender
- Phone
- Address
- PCP = Who they booked with
- Payment type
- Note = Add Zocdoc.
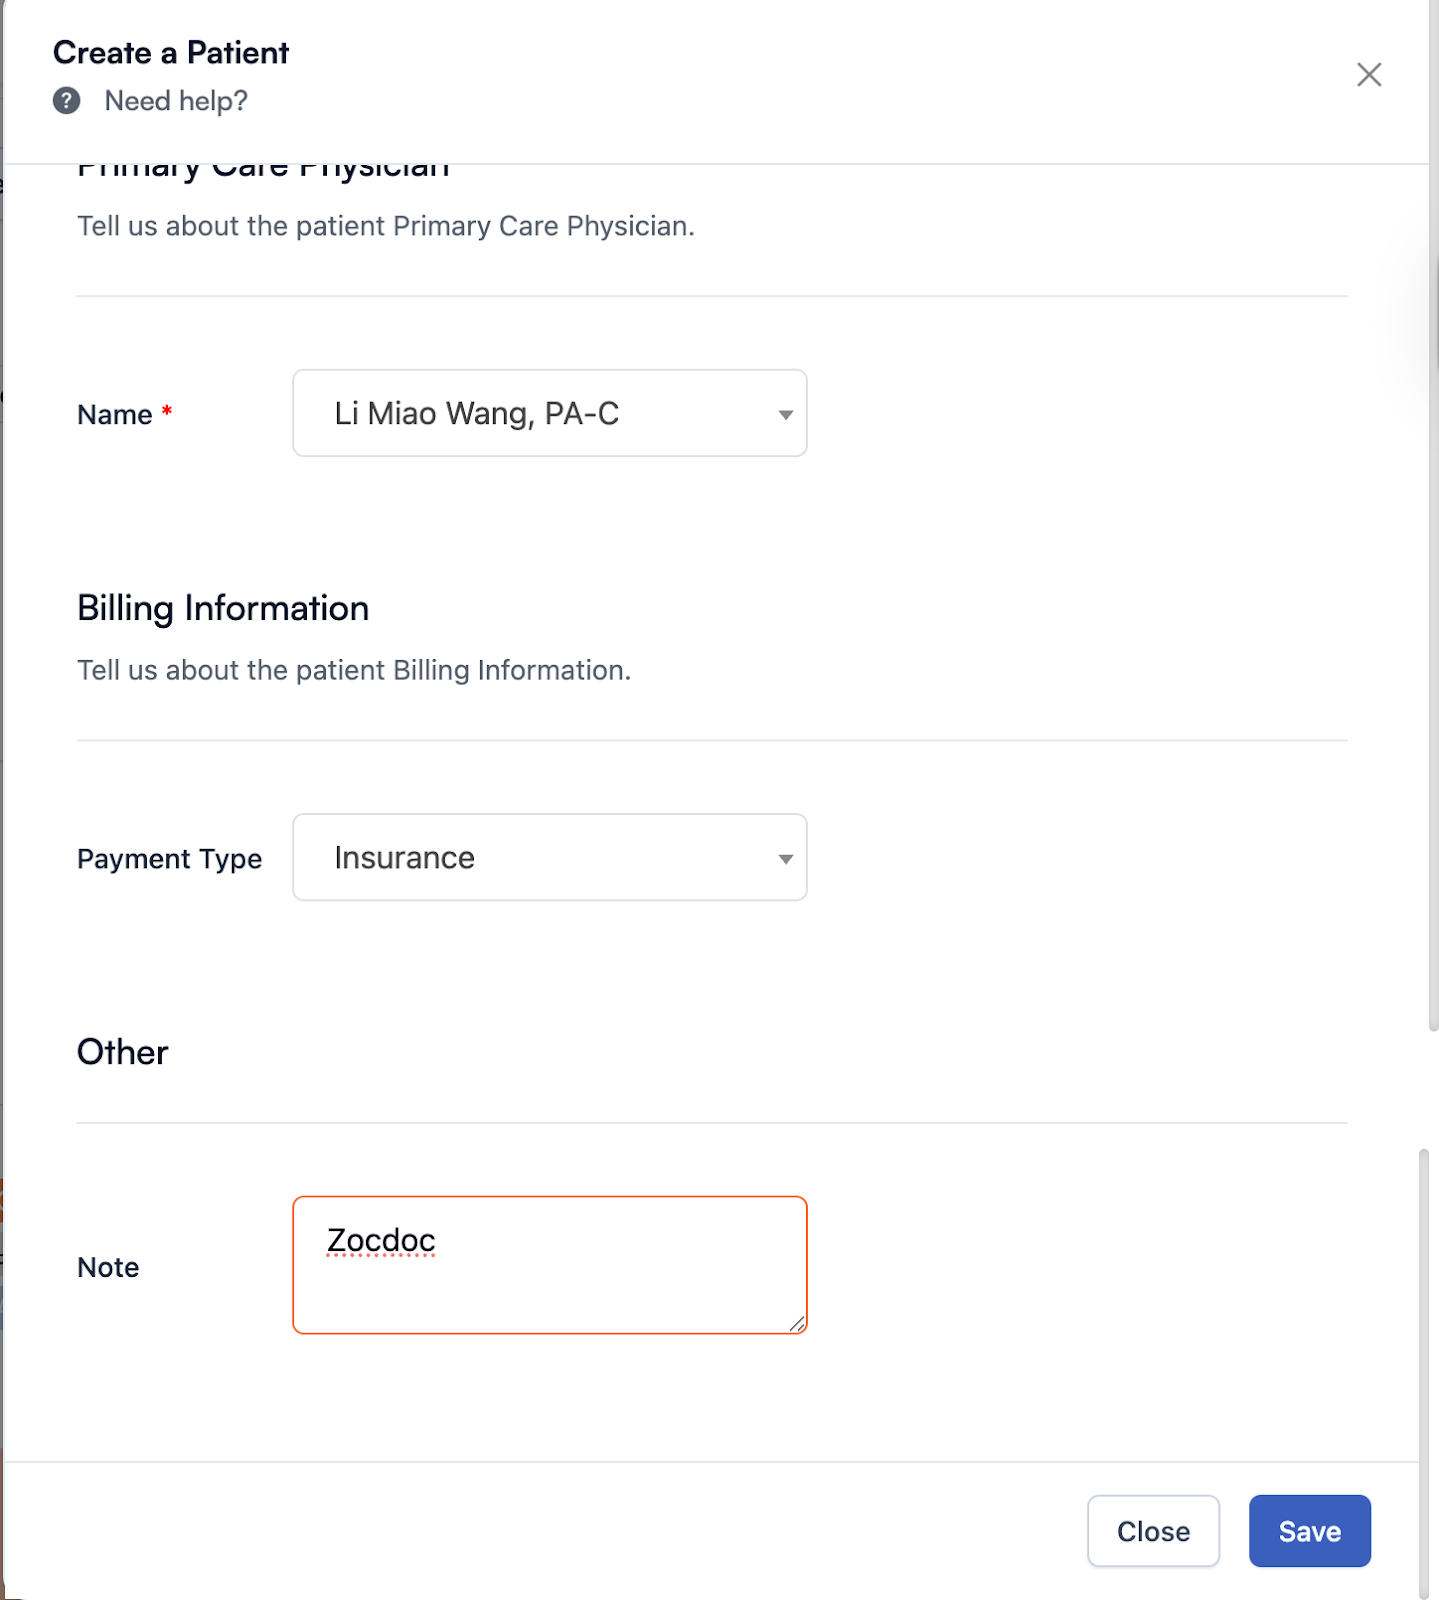
- Using the information we have, you will be able to fill in the following fields:
- Once you press save, the Patient will be added to our EHR and they will receive an email and SMS telling them to download the Patient app.
- Now you will need to add the appointment to our system. To do this select + Add > Appointment. (Since you just added the Patient, it should show their name in the Patient field)
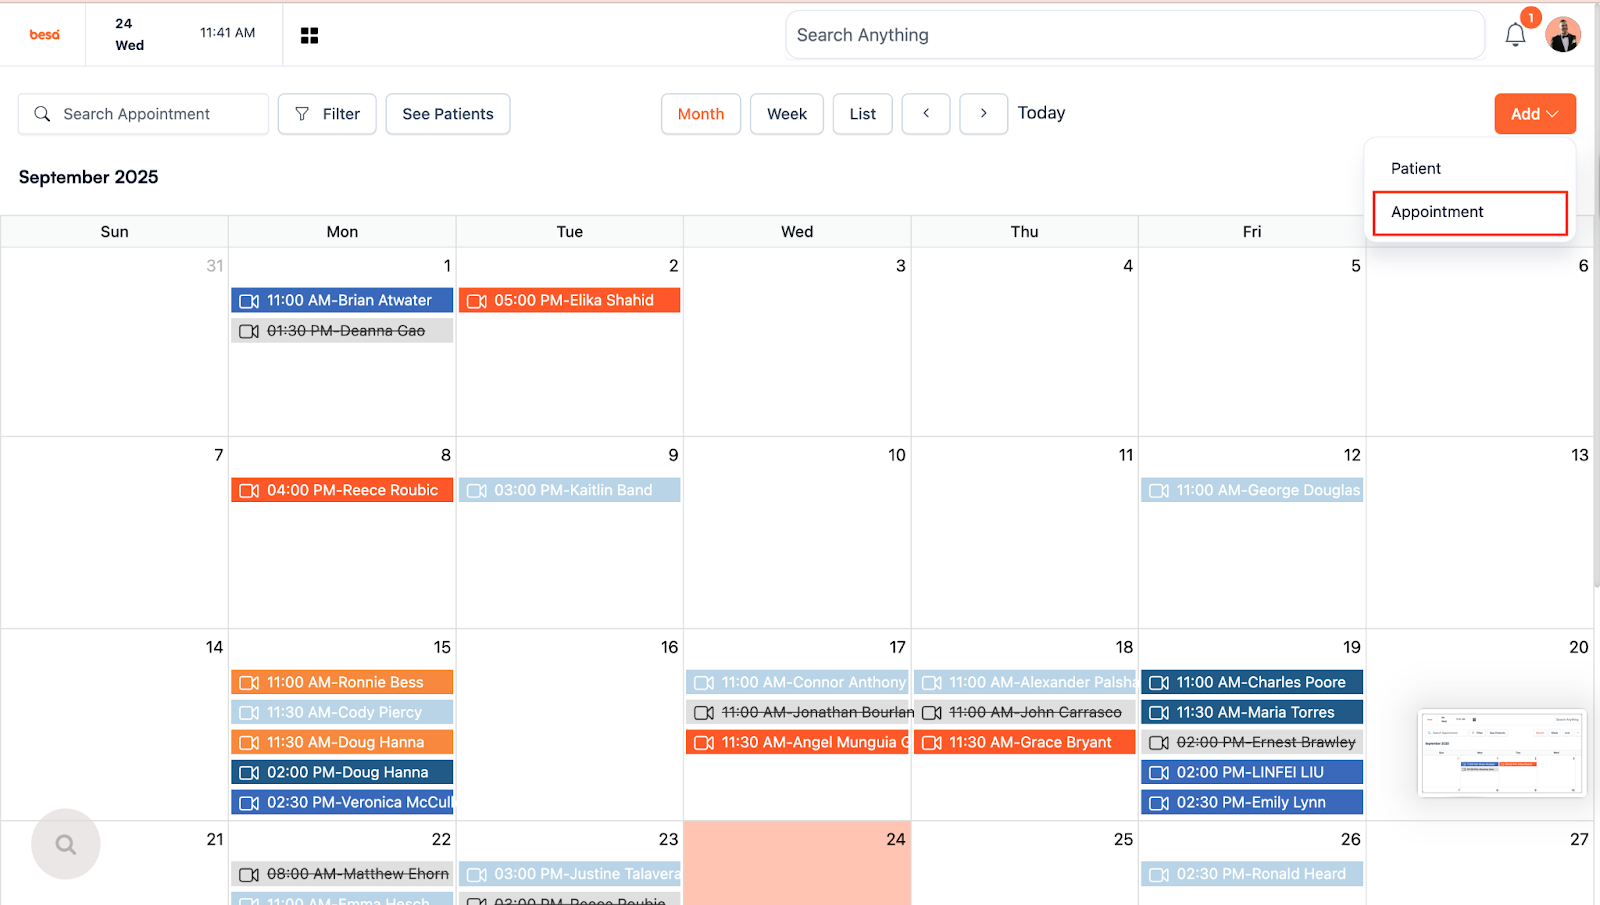
- Using the information in Zocdoc, create the appointment as they have booked it.
Be sure to add Appointment booked through Zocdoc. In the notes. This lets the provider know that in case the Patient does not get on our app, they will be able to see the Patient through Zocdoc.
If the Patient put in a note for the visit (Sometimes they do), be sure to add it after the booked through Zocdoc disclaimer.
Here is what it would look like.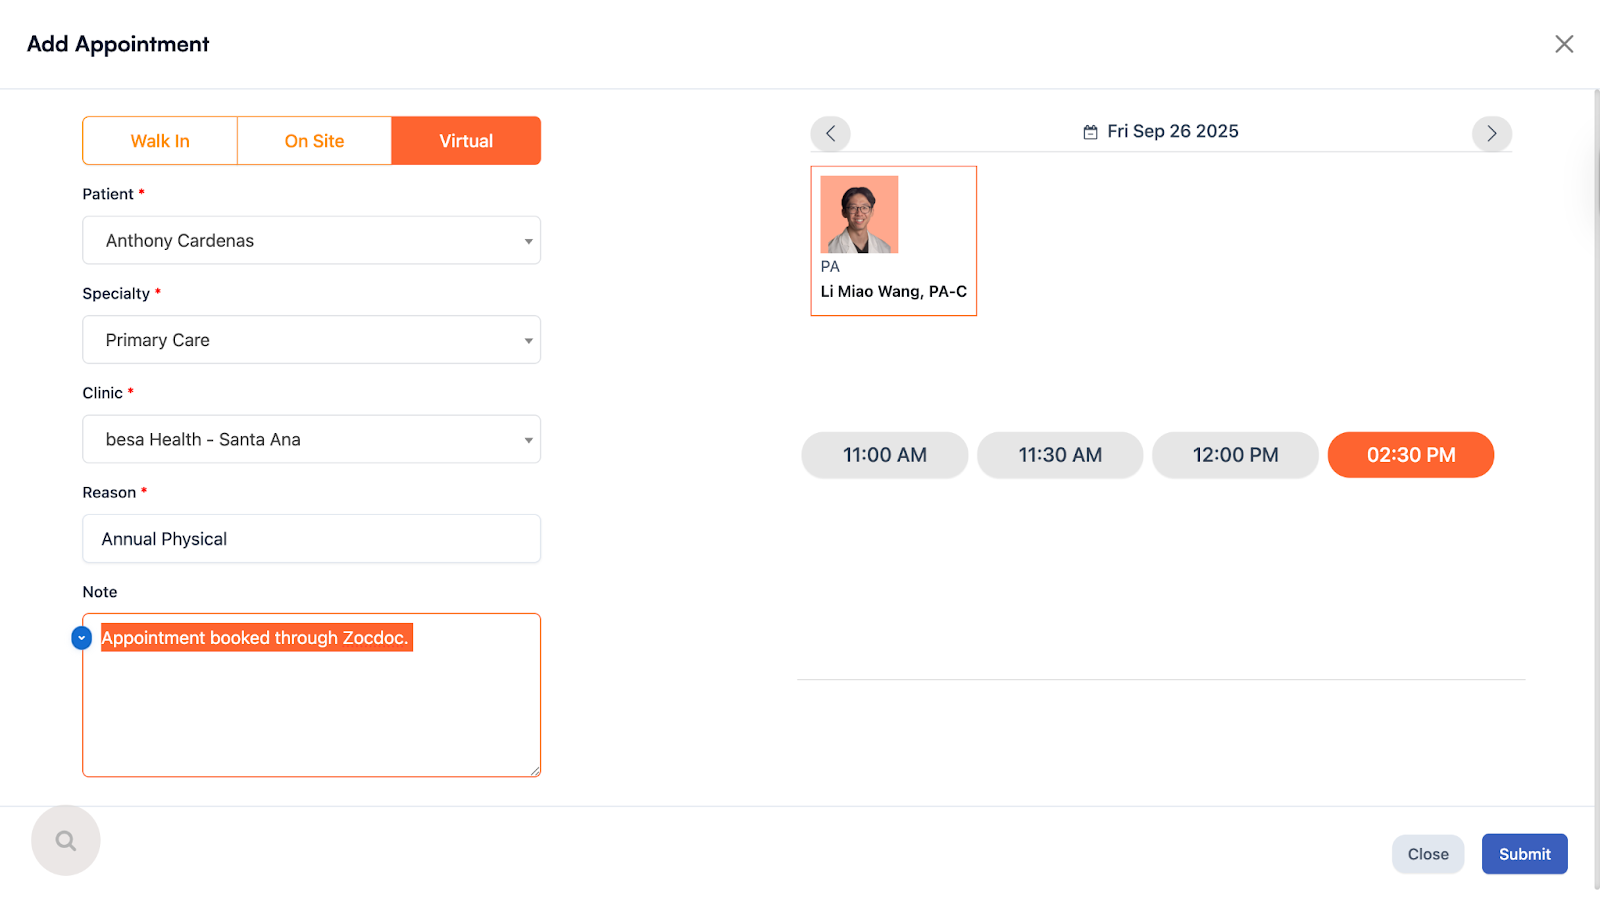
- Go to the messages page and send the Patient a chat so they know they can reach out to us (Through Patient Support).
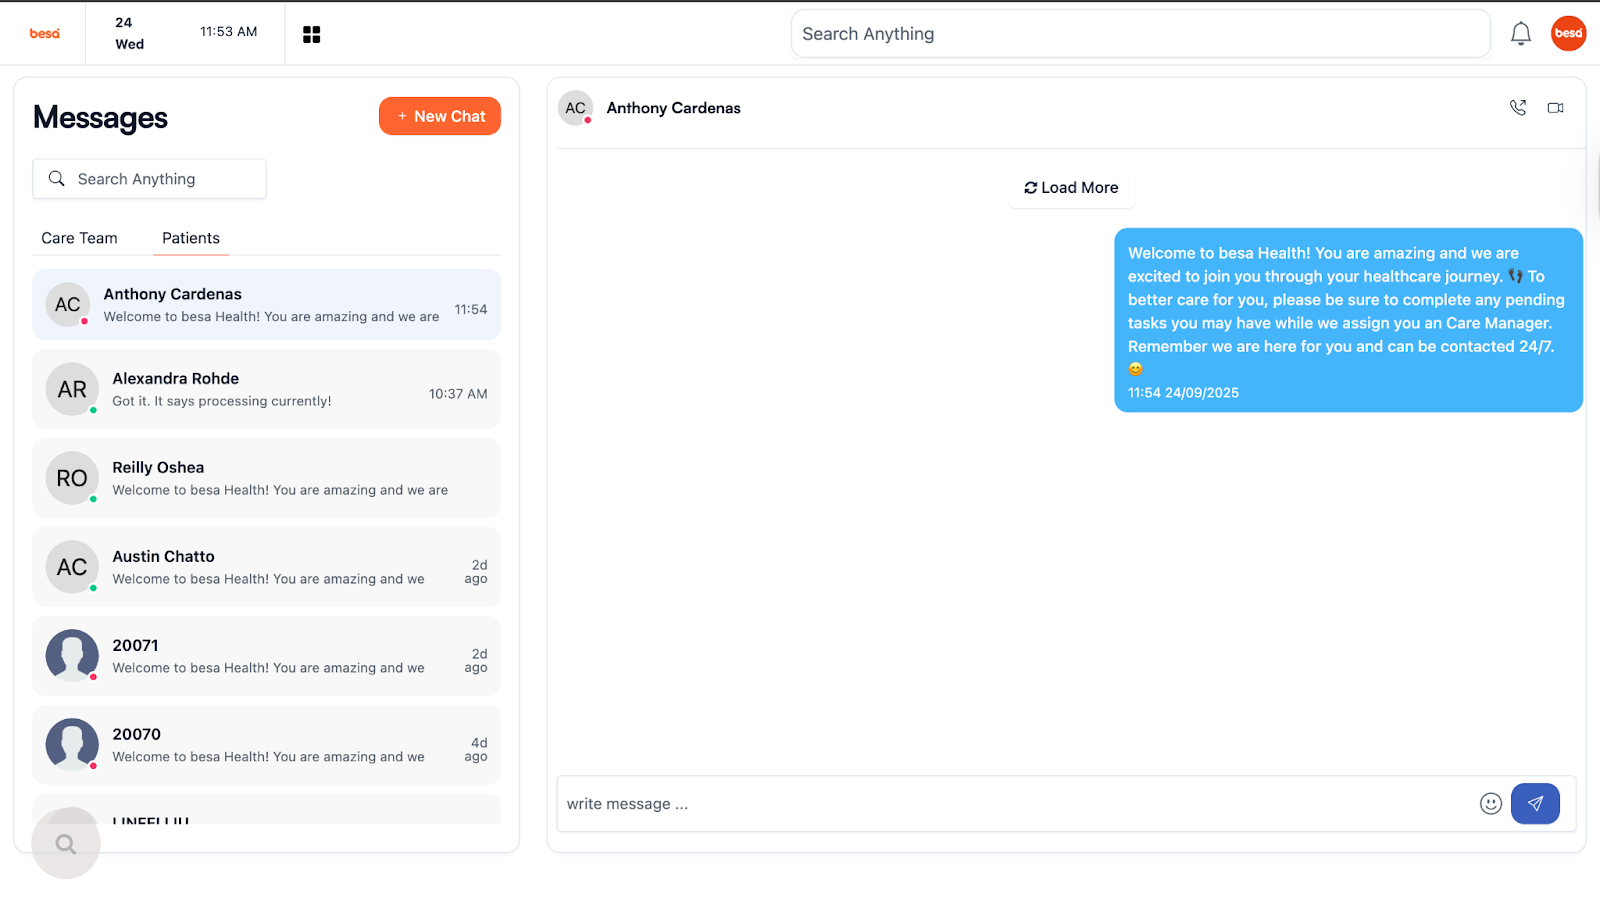
- To complete the Patient demographics and insurance, go to the Patient detail page and click Demographics.
- In the demographics tab you will need to enter the following:
- PCP
- Care Manager (Should be you)
- In the insurance area you will need to enter the following (You are getting this from the card and the eligibility check):
- Carrier Name
- Member ID
- Group Number
- Relationship
- Copay
- Deductable
- Rx Bin# (If you have it)
- Rx PCN (If you have it)
-
Rx Group# (If you have it)
- Scroll down to the bottom section, Documents, and upload the DL, Insurance card, and Consents we got from Zocdoc.
Here is how it will look completed: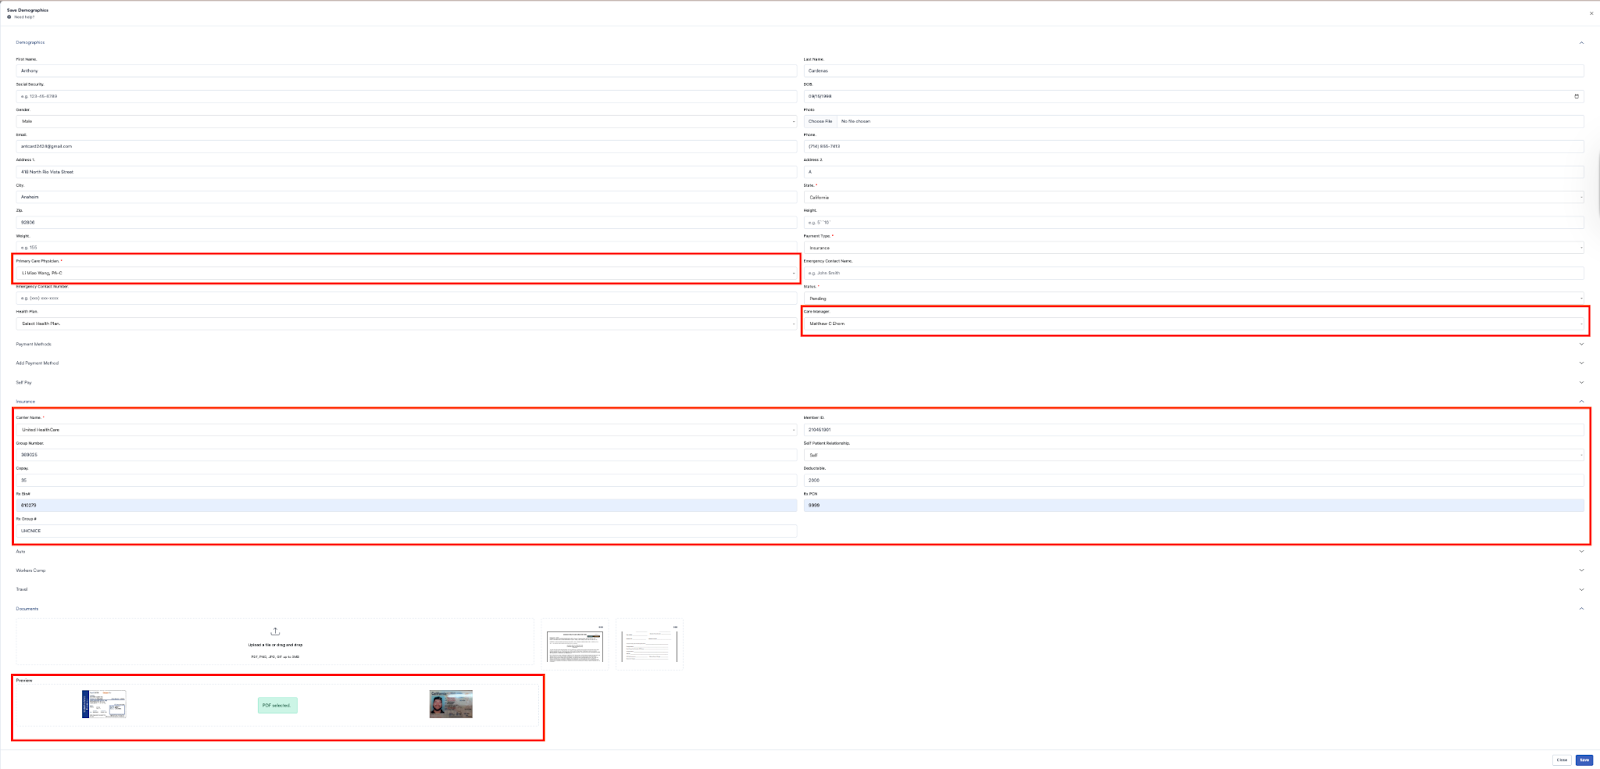
- Login to LabCorp to add the Patient. Be sure to study the Labcorp Folder which has a lot of info and tools for you.
- Click Lab orders > Search Patient last name > Click Create New Patient
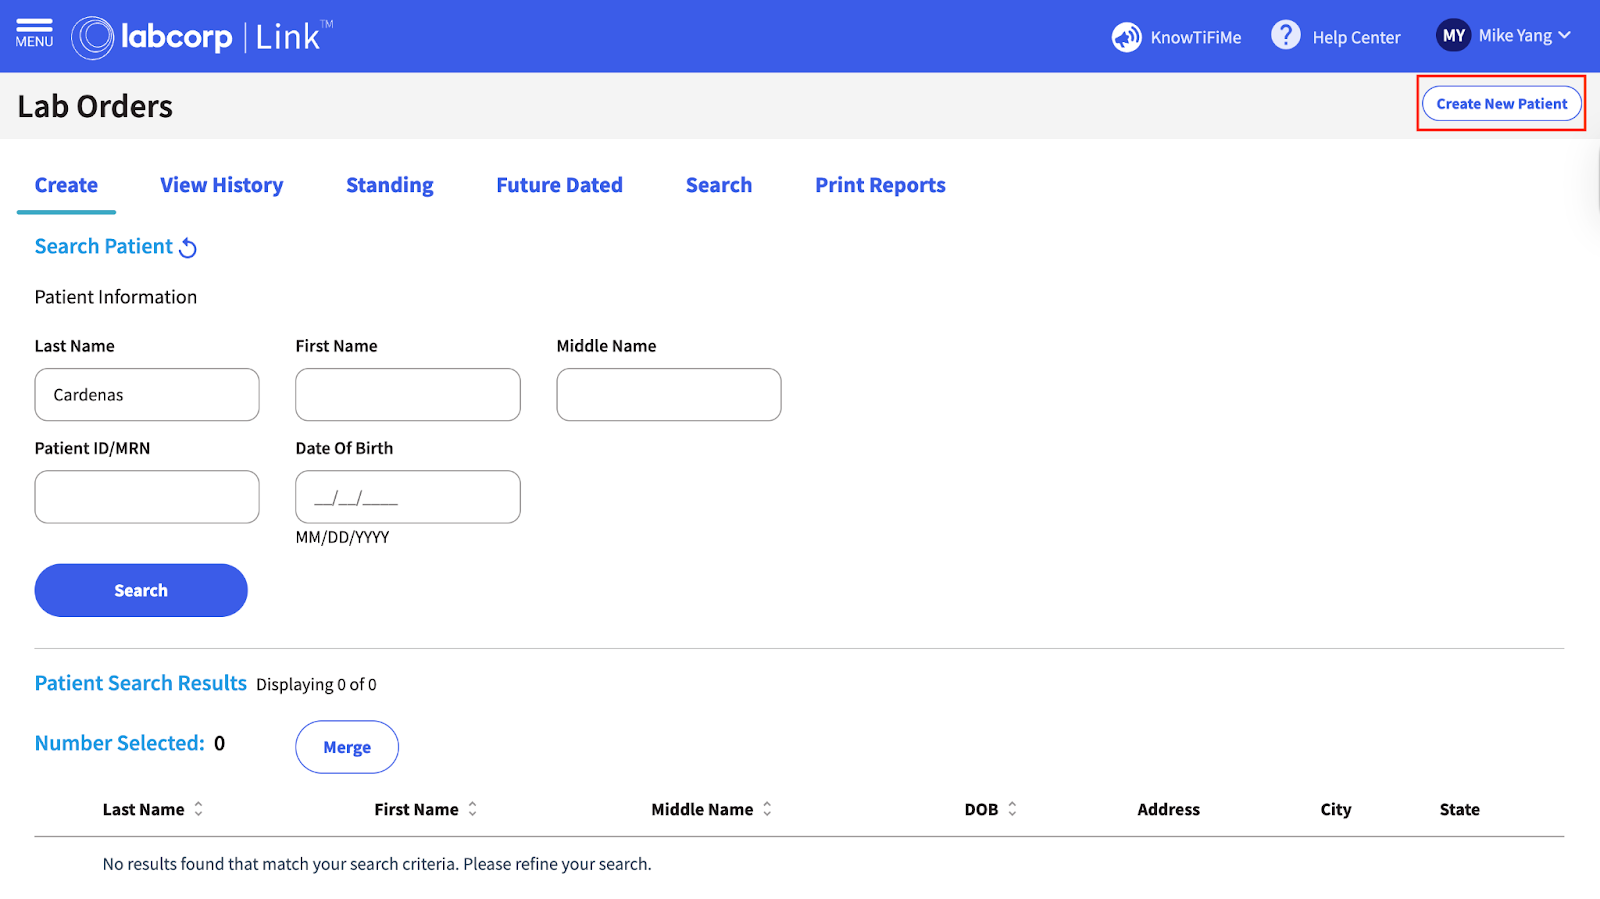
- Using all the information from the Patient detail page and the insurance eligibility check, complete everything needed. When done, click Save.
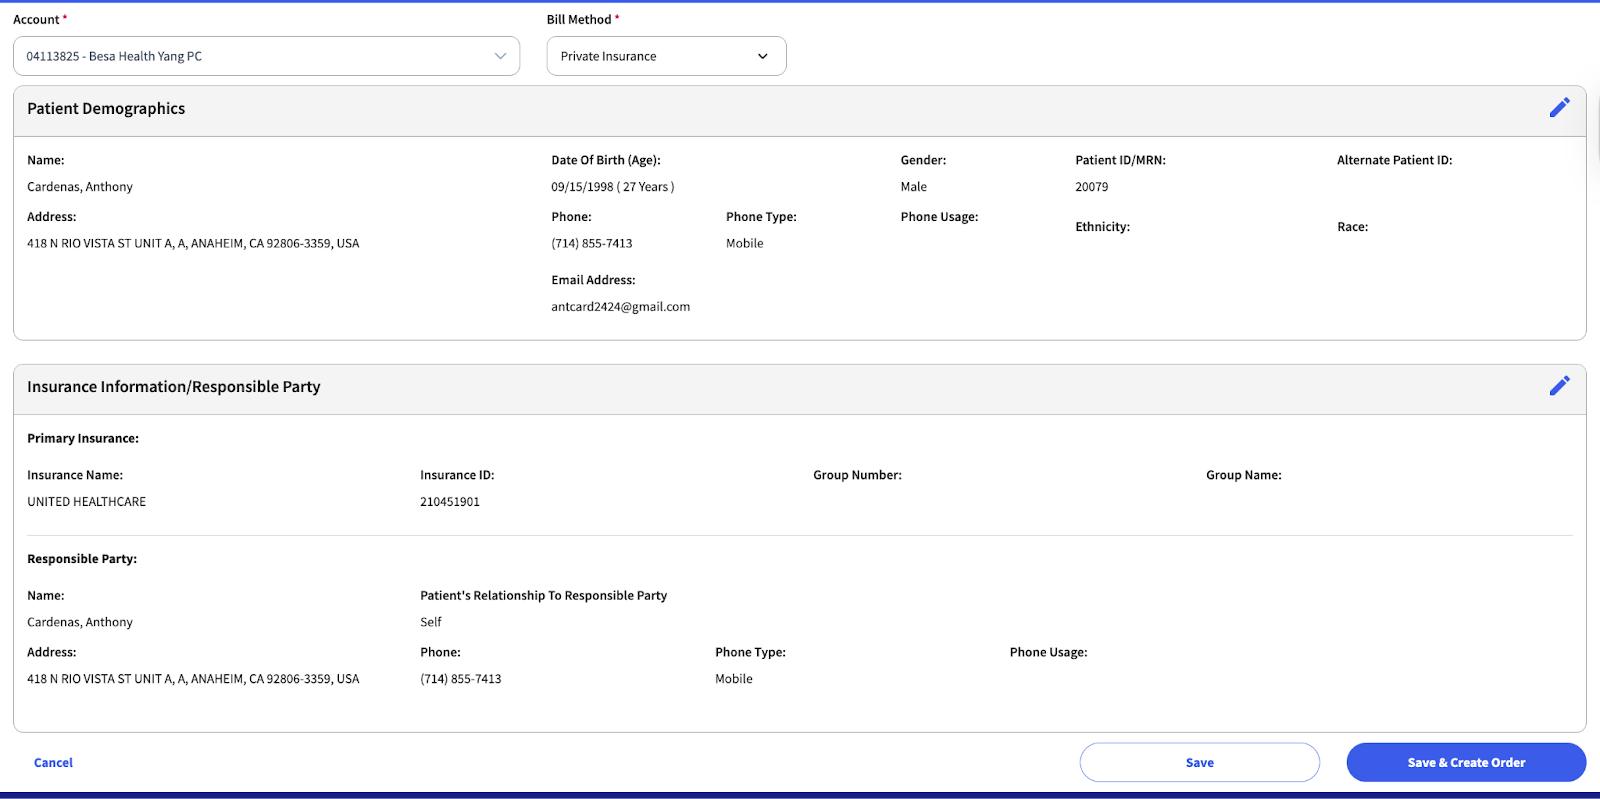
- Login to Radnet to add the Patient for imaging.
- Click on Orders > Create New Order
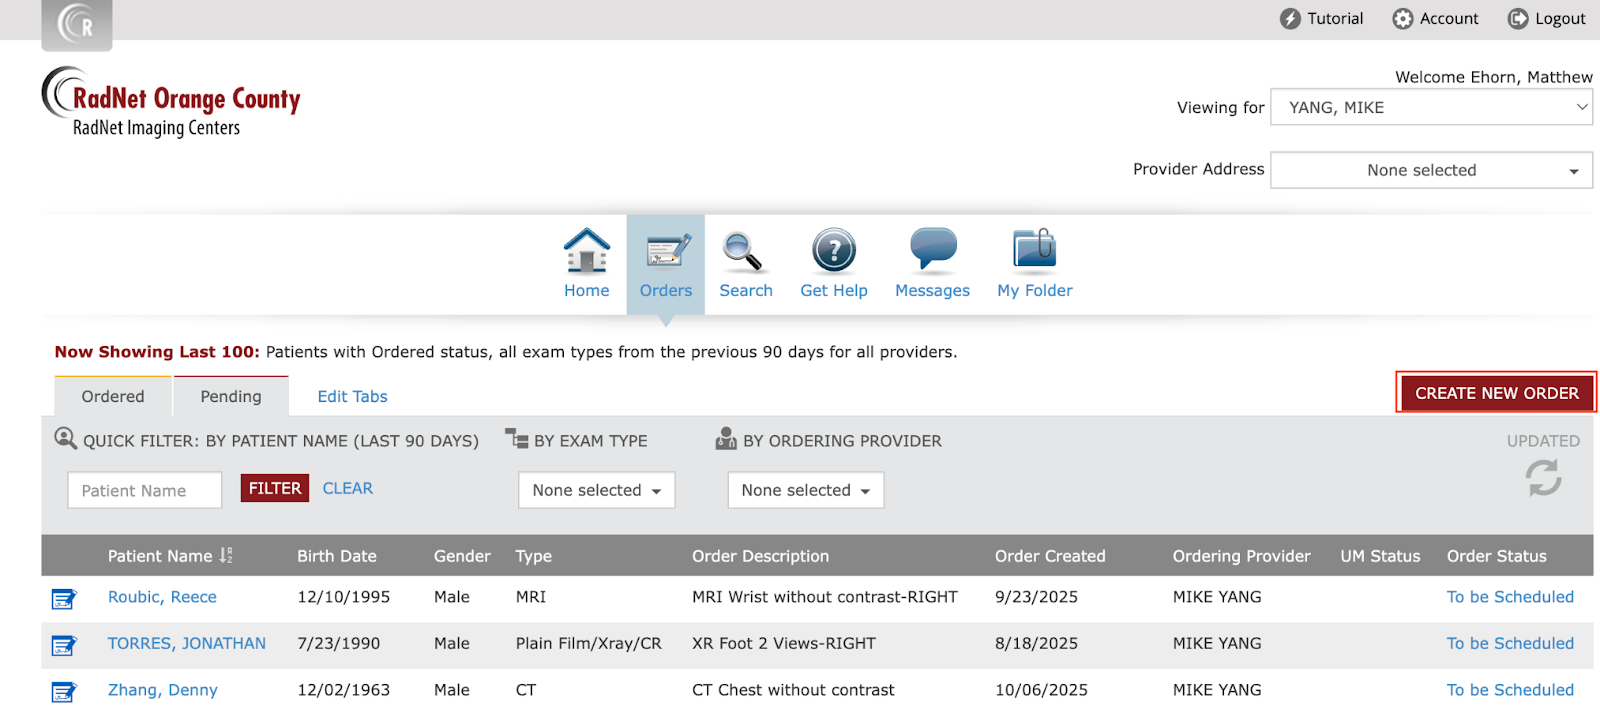
- Enter in the Patient information and click Search.
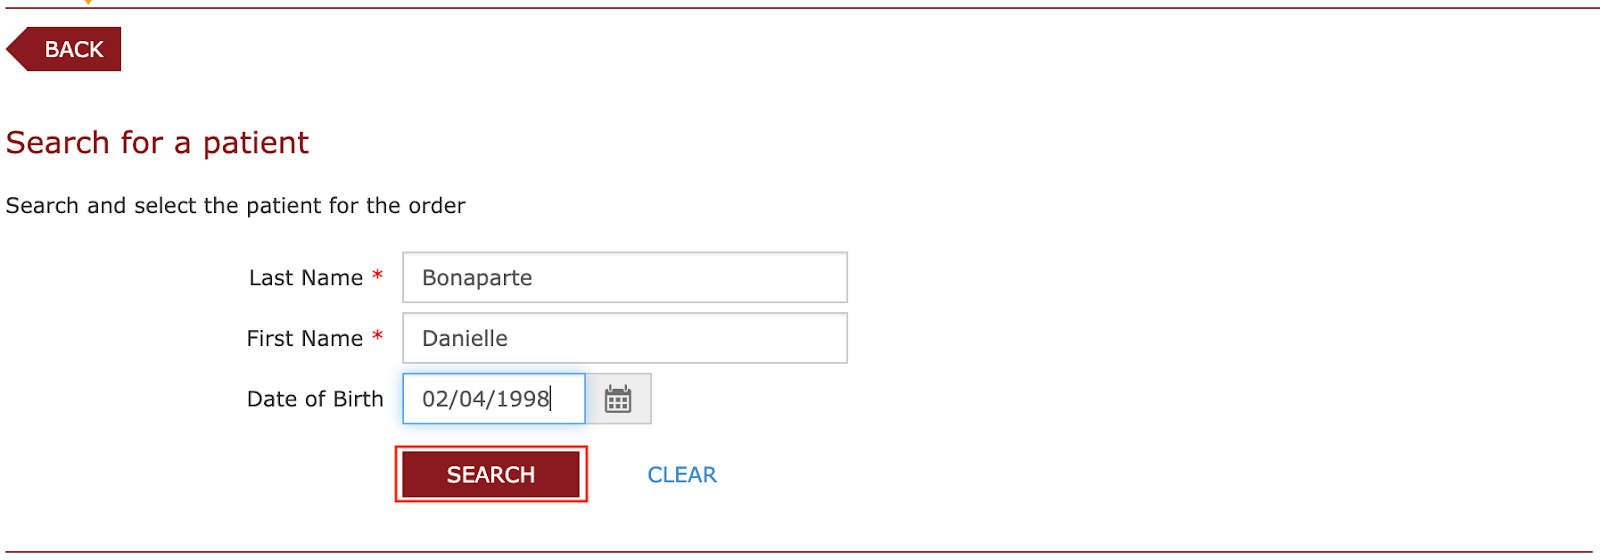
- If you see the Patient name and information listed, you will just need to confirm we have the same information. If not, be sure to update it with things such as email because that is how the Patient gets notified to book an appointment.
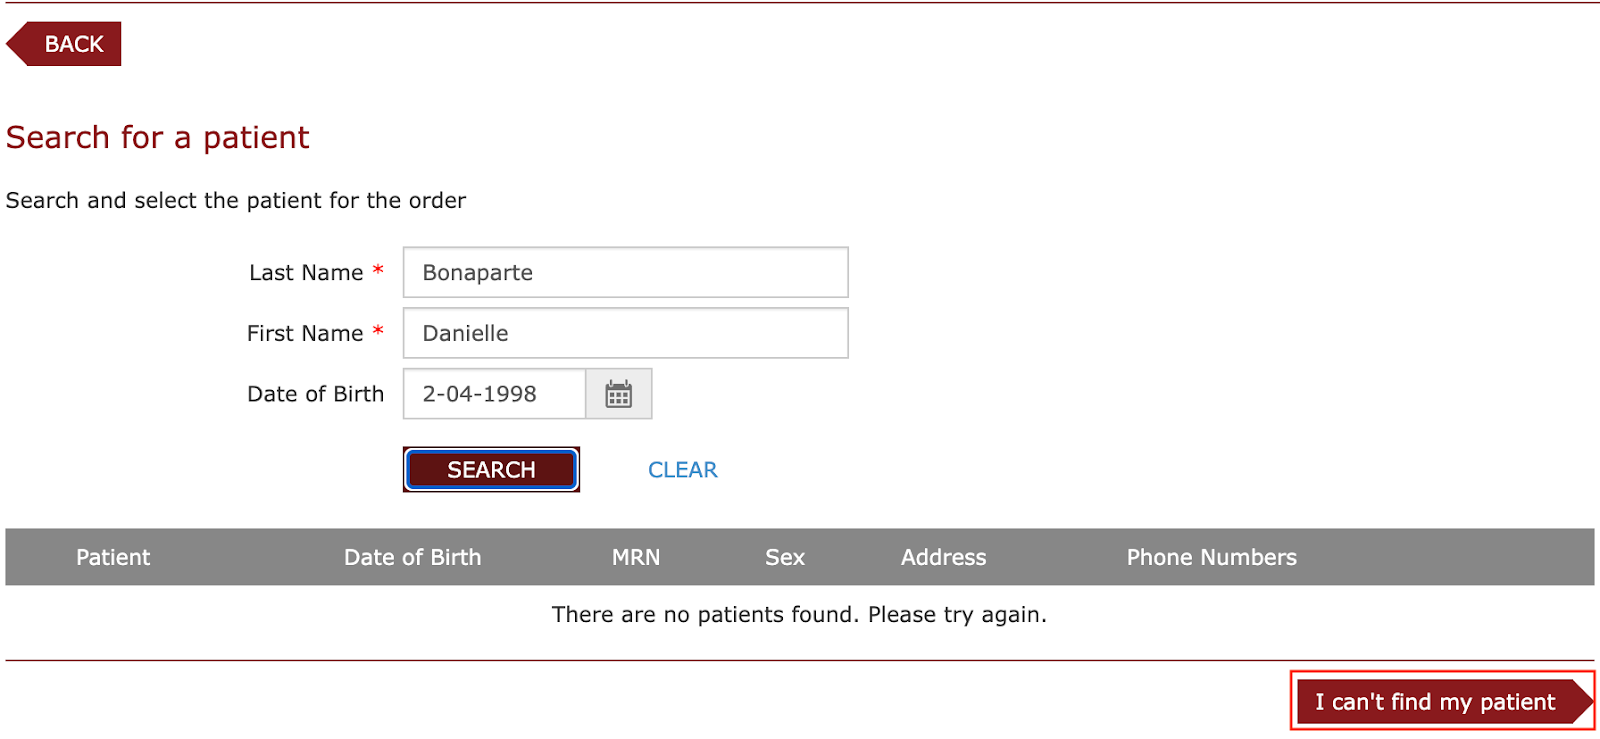
- If there are no results found, click, I can’t find my Patient
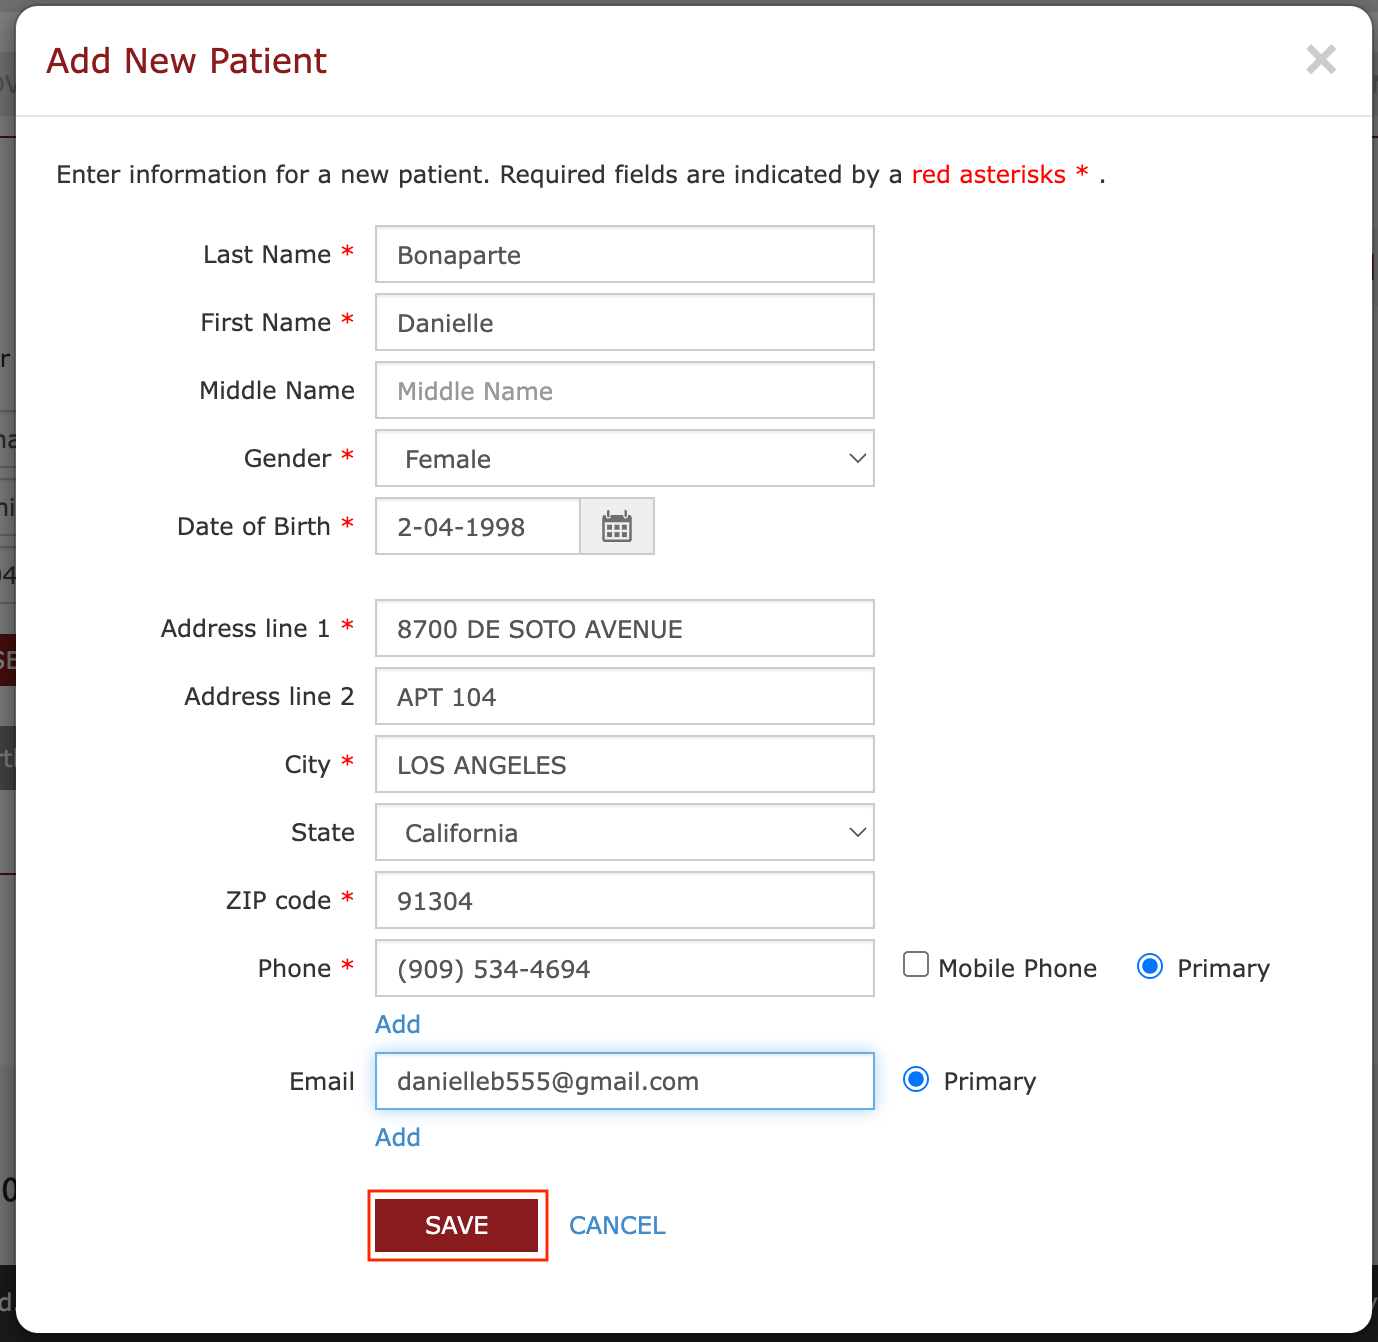
- Using the information you added to the EHR and all other sources, fill out the form to its entirety and click Save.
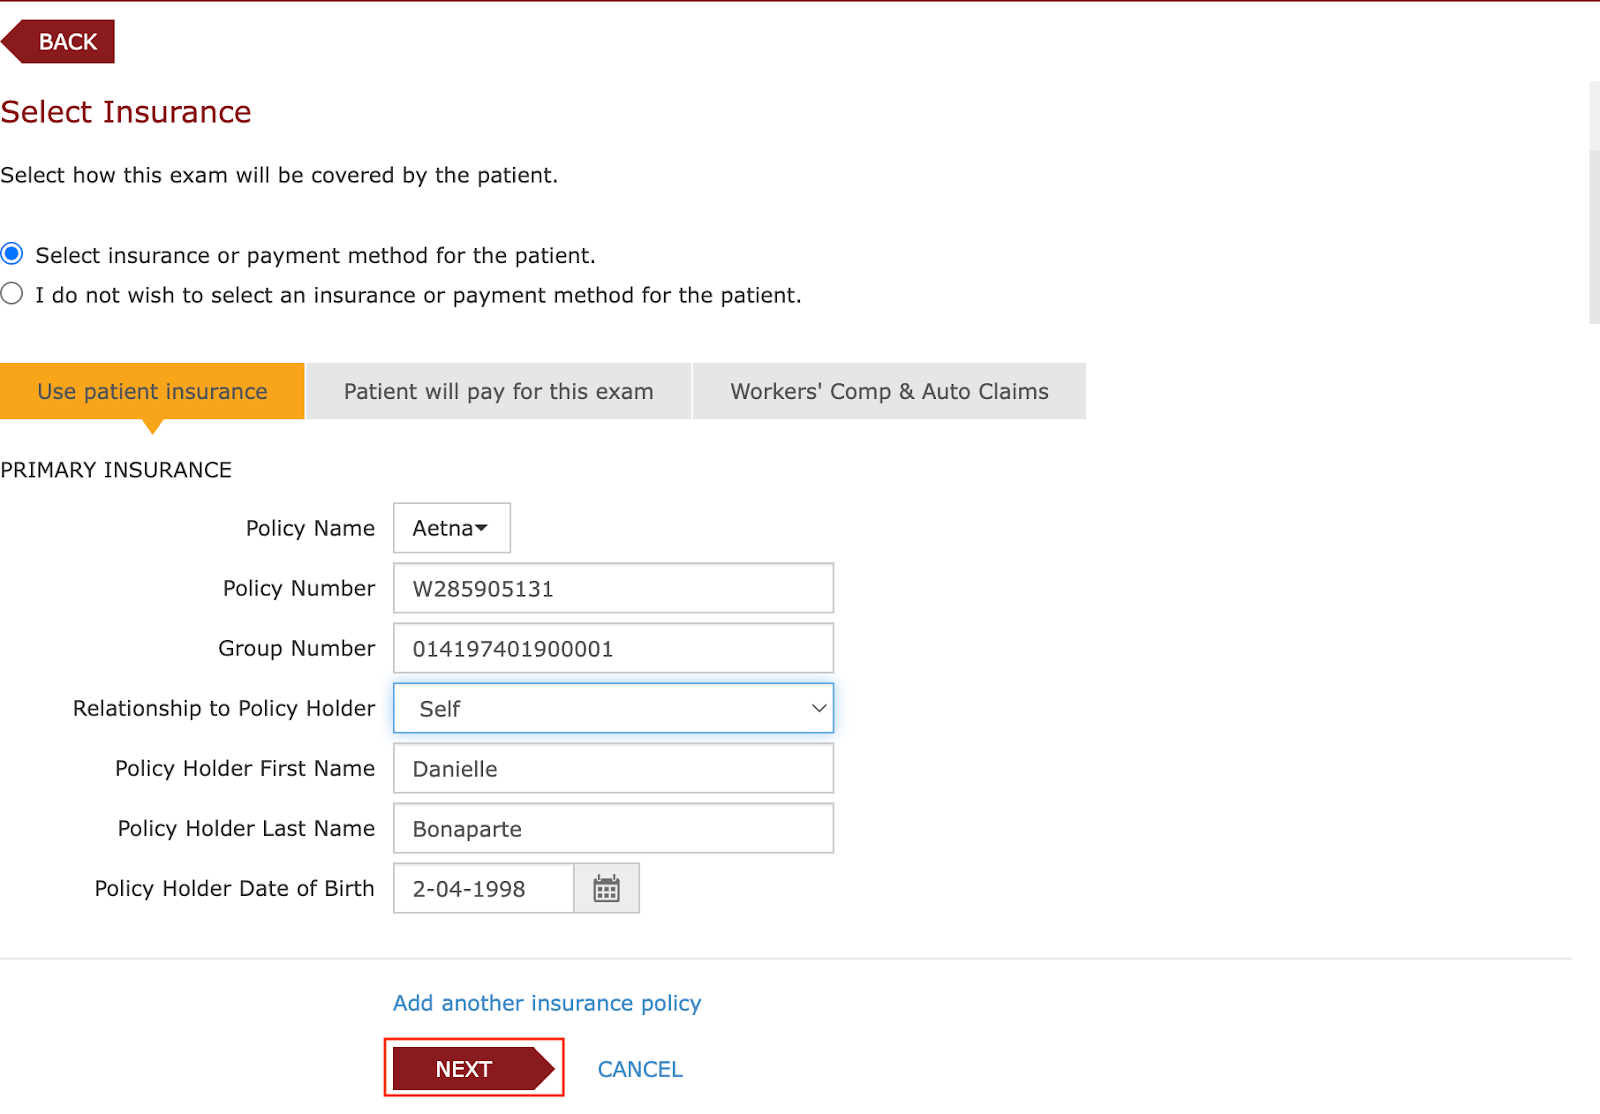
- Now you will need to add the Patients insurance information you gathered from those same sources. When finished click Next.
- The Patient has now been added to Radnet!
- Login to MD Toolbox to add the Patient for eRx orders.
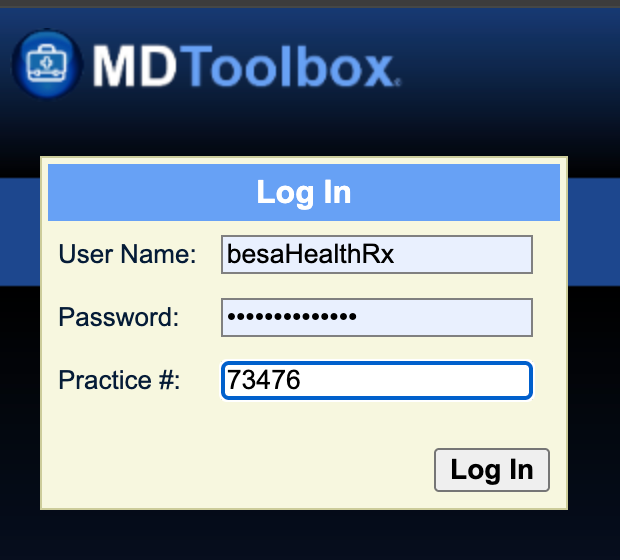
- When you login, click on the Find Patients tab
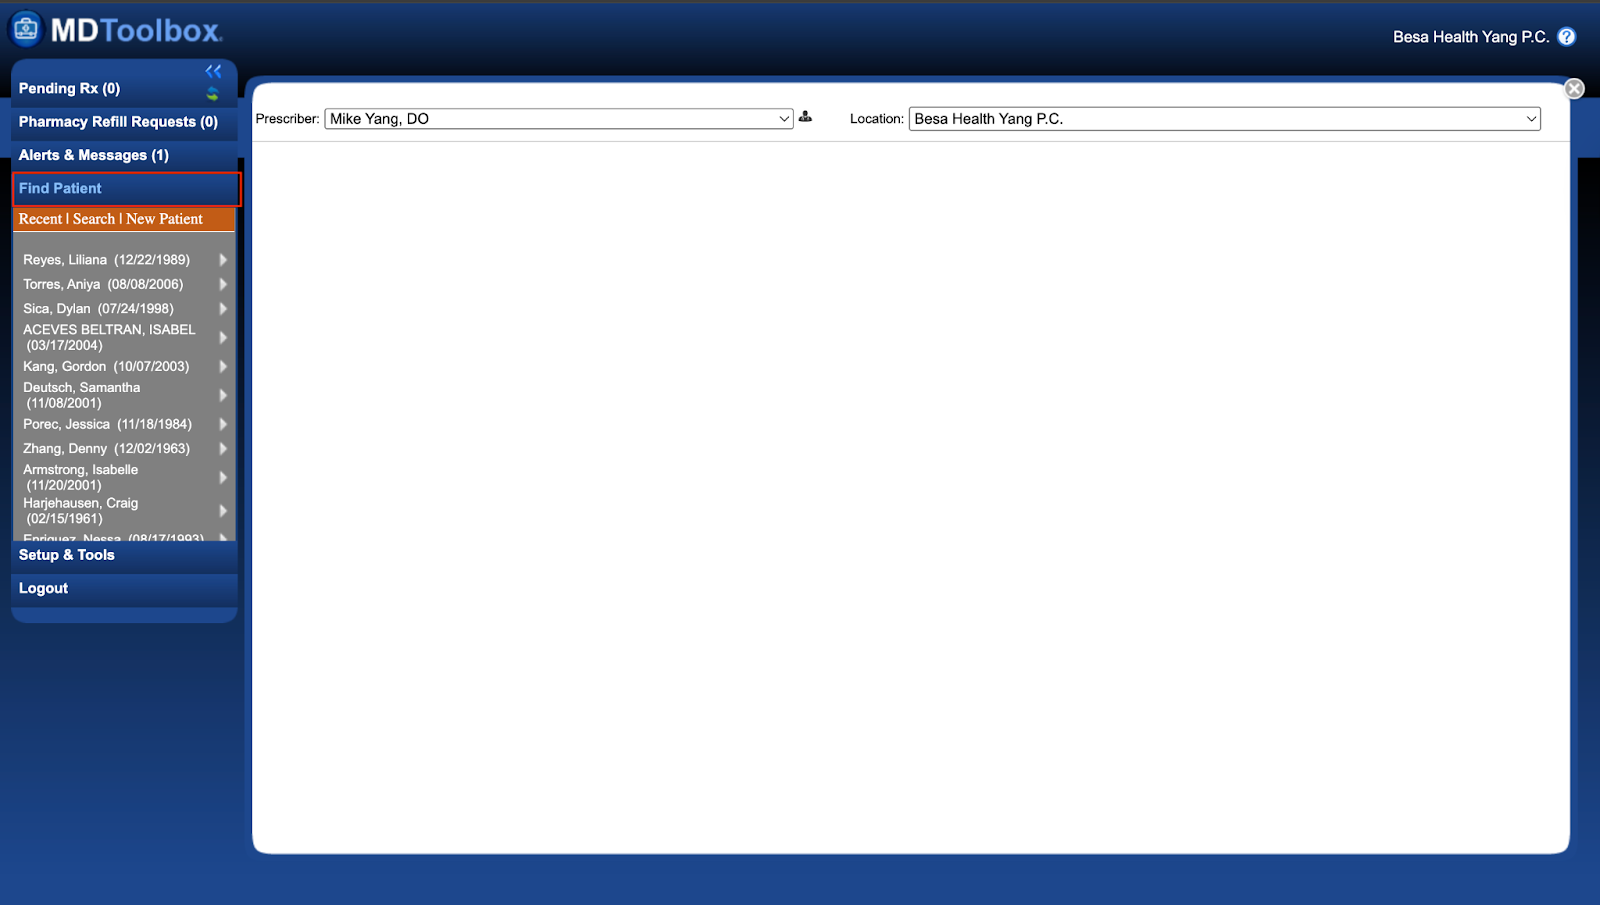
- Select New Patient to pull up the create Patient form.
- Using the information from the Patient profile, fill out the following fields:
- Last Name
- First Name
- Address
- City
- State
- Zipcode
- Phone
- Gender
- DOB
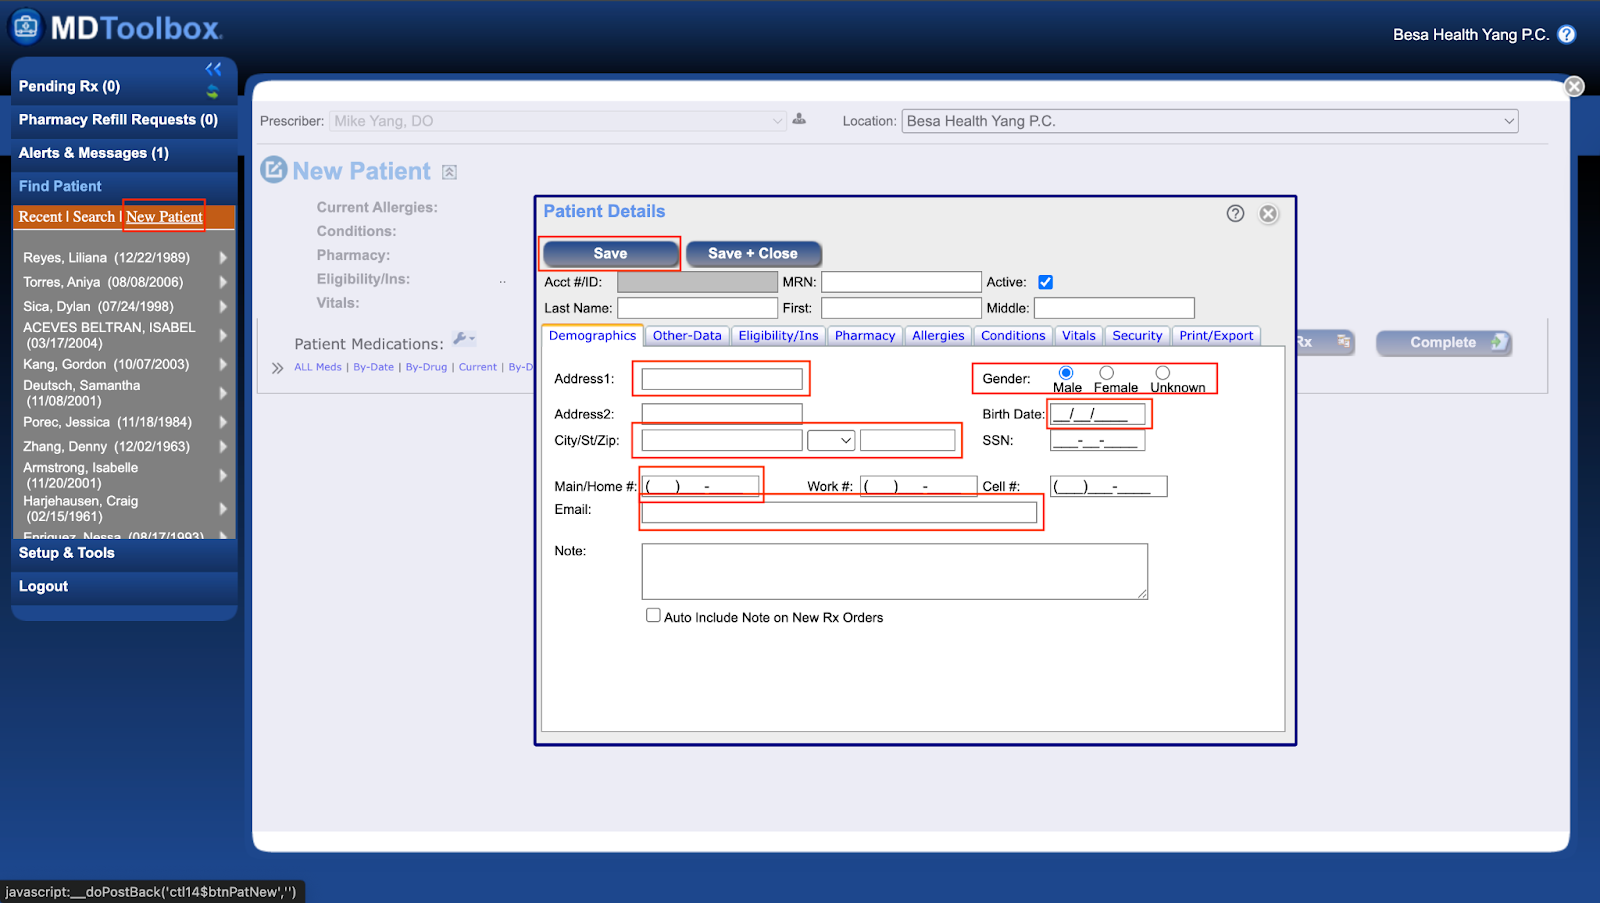
- Once you will in all the Patient demographic information, click Save and select the tab Pharmacy.
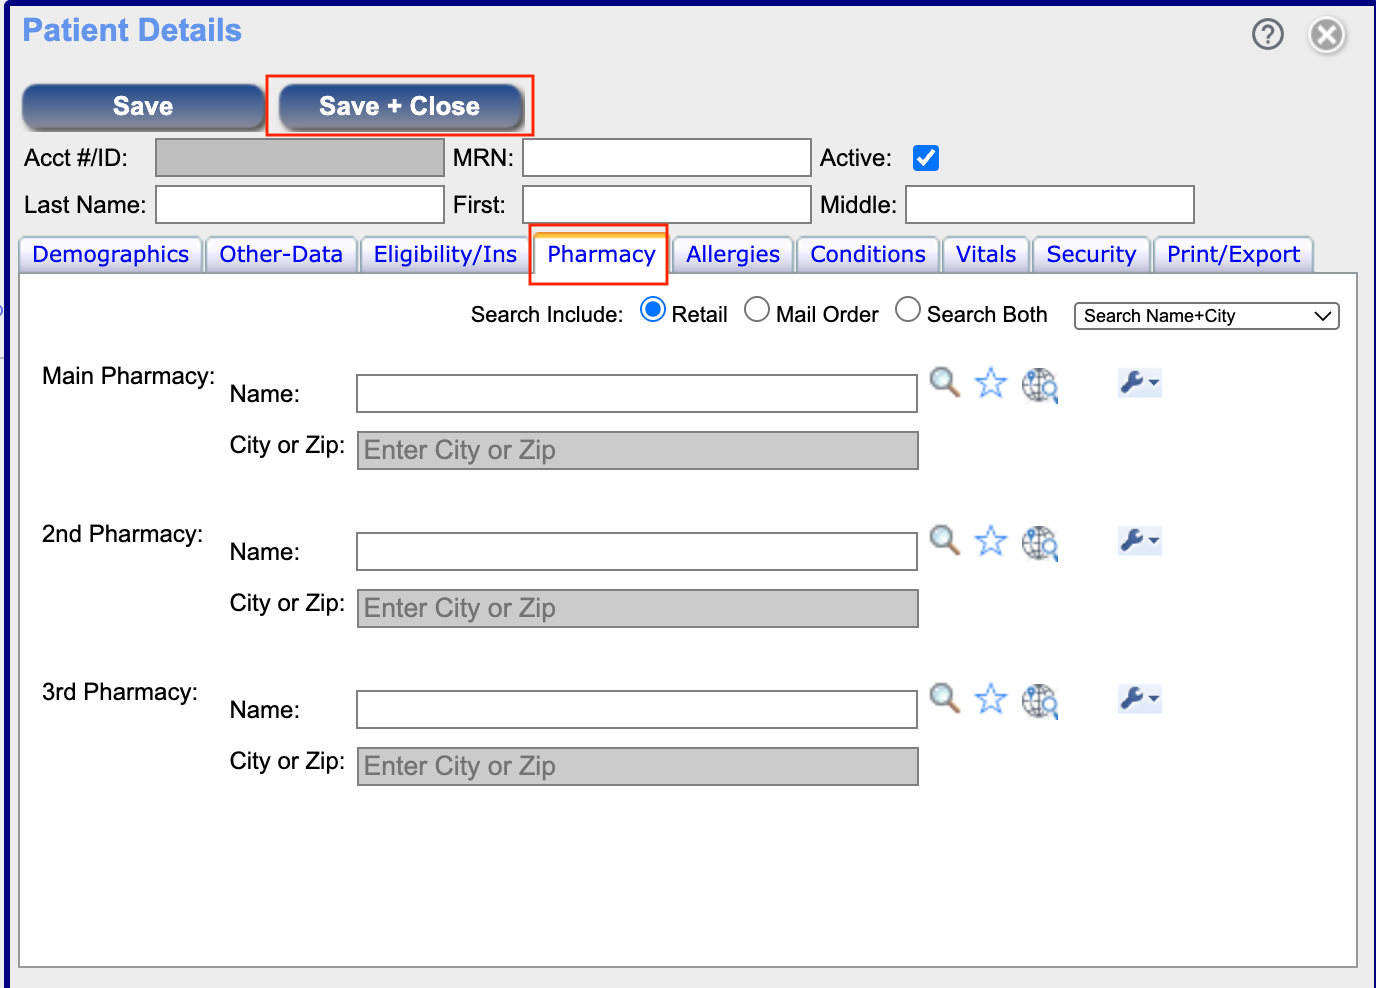
- On the pharmacy tab, you will need to add in the Patient’s preferred pharmacy. If We don’t have that information press Save + Close and you’re done.
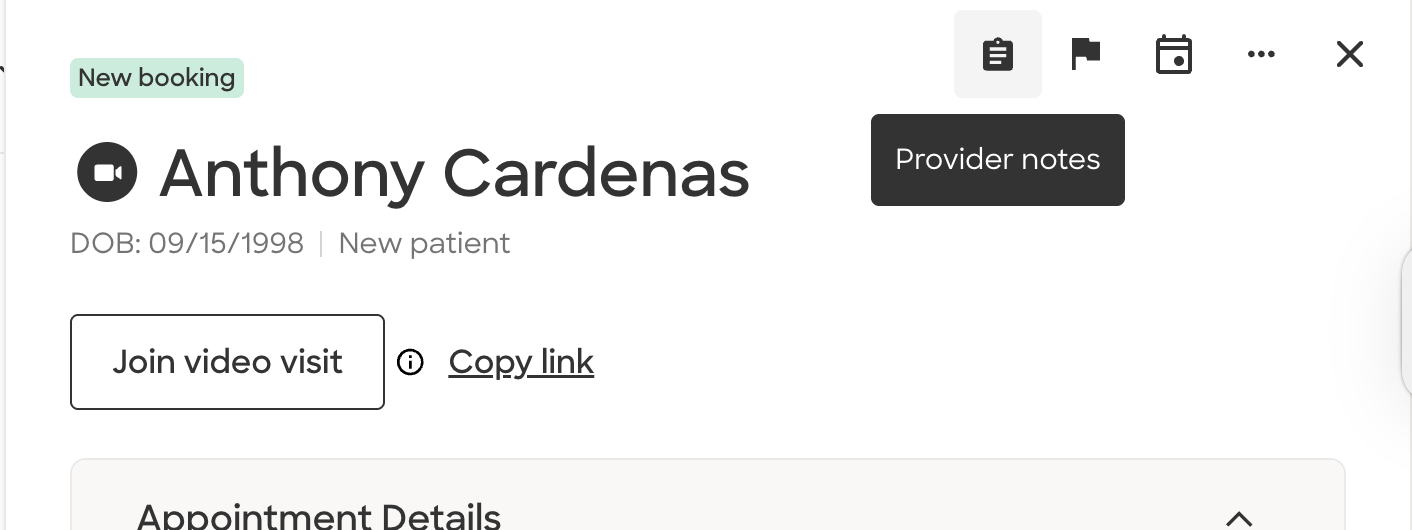
- Go back to Zocdoc, and leave a note on the Patient booking stating, “Added to EHR”
-
Just as we send the Patient an automated message to download the besa Health app, we are also automatically sending them an email to add a payment method on file. This gets sent 10 minutes after you add them to then EHR. If they have not added a payment method it also sends them another message before their visit.
-
If a Patient has not added a payment method on file with 1 hour before their appointment, we will need to cancel the appointment. We will do this by doing the following:
The Patient requested this cancellation > The Patient no longer needs this appointment
Here is a video to help you out.
Adding patient from zocdoc 2.mp4
Comments (0)