
Appointment creation and navigation is one of the most basic understandings you can have with the system. Without properly knowing how to navigate this area, you will surely not know how to do anything else in the system. In addition to this article, be sure to click around and get used to the forms prior to taking the EHR basics quiz. Don't forget - details matter.
📚 Resources Needed
🚀 Tips & Tricks
- Anything and everything must be done with intention.
- There are several view options. Pick the one you enjoy best.
- You can create patients here as well.
- The appointment page factors in several conditions, making it so that the right provider is treating the patient based on their specialty or chief complaint.
- Time zones are being considered. You will see the times available for the provider based on your timezone.
- When an appointment is created, the provider will be notified
📘 Instructions
- Login to besa EHR using your credentials.
- Click on the Calendar icon
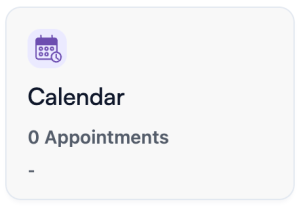
- From here, you will see all the appointments that we have in the system.

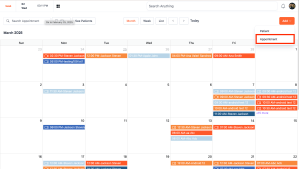
Some key navigation actions you can make are:- Day, Week, Month viewer
- Filter
- Search
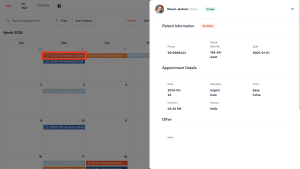
- To view appointment details click on the patient card and the appointment details will slide in.
- To add an appointment, you can click on the date in the calendar or click + Add > Appointment
- The appointment form will pop up
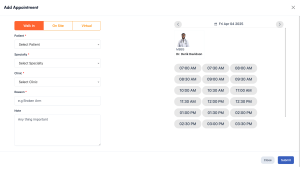
- On the appointment pop up, you'll need to pick what kind of appointment it is, Patient needing the visit, Chief Complaint information, Day & Time, and the Provider they will be seeing.
- Keep in mind that depending upon the specialty you selected, only certain providers will show in the possible results area. Many conditions have been added to the logic for appointment which should streamline the appointment creation process and reduce hiccups.
- Once everything has been completed and time has been selected, click Submit. This will add the appointment to the calendar, the patient app, and will notify the Provider.

Comments (0)