
When working the coffee bar, we will also be responsible for checking in a Patient for their visit. Because of this it is important that you always check the schedule to see who may have already had an appointment scheduled. This article is for when a Patient has already booked an appointment. Not a walk in. Look below at the some of the necessary steps when checking in a Patient.
📚Resources Needed
🚀 Tips & Tricks
- Patients have the besa Health Patient app where they can do all things related to intake such as pay copay and check in as arrived.
- A Patient is emailed 15 min before to collect copay. They don’t always do that so we have to watch this.
- We need to collect any outstanding copay before changing status to arrived.
- Patients with the Member plan get a free drink via their Patient app. Patients who do not have a plan get half off by using the Patient discount code.
-
The color of dot after Patient name tells us if they have completed the intake.
- Orange = No
- Purple = Yes, not confirmed
- None = Yes, and confirmed
-
The video icon before the appointment time means it's a telehealth visit. No camera means it's an in-person visit, and they will be coming to the clinic.
👋 First Words at the Counter
When someone approaches the counter:
- Make eye contact
- Smile
- Stand upright with open posture
- Give them your full attention
Standard Opening (For Everyone):
“Hi there! What can I get started for you today?”
Do not assume they are a Patient.
✔️ When you know it is a Patient.
Once you know that it is a Patient that walked in, you will need to mark them as arrived. They can also do this via the call to action button in the Patient app in their appointment area.
- Click on the besa Health icon from the iPad. This should automatically open up the appointment page.
⚠️Click on the list tab to get a better view of the Patients.
- Find the Patient, listed there in the appointments, then click on the Patient name
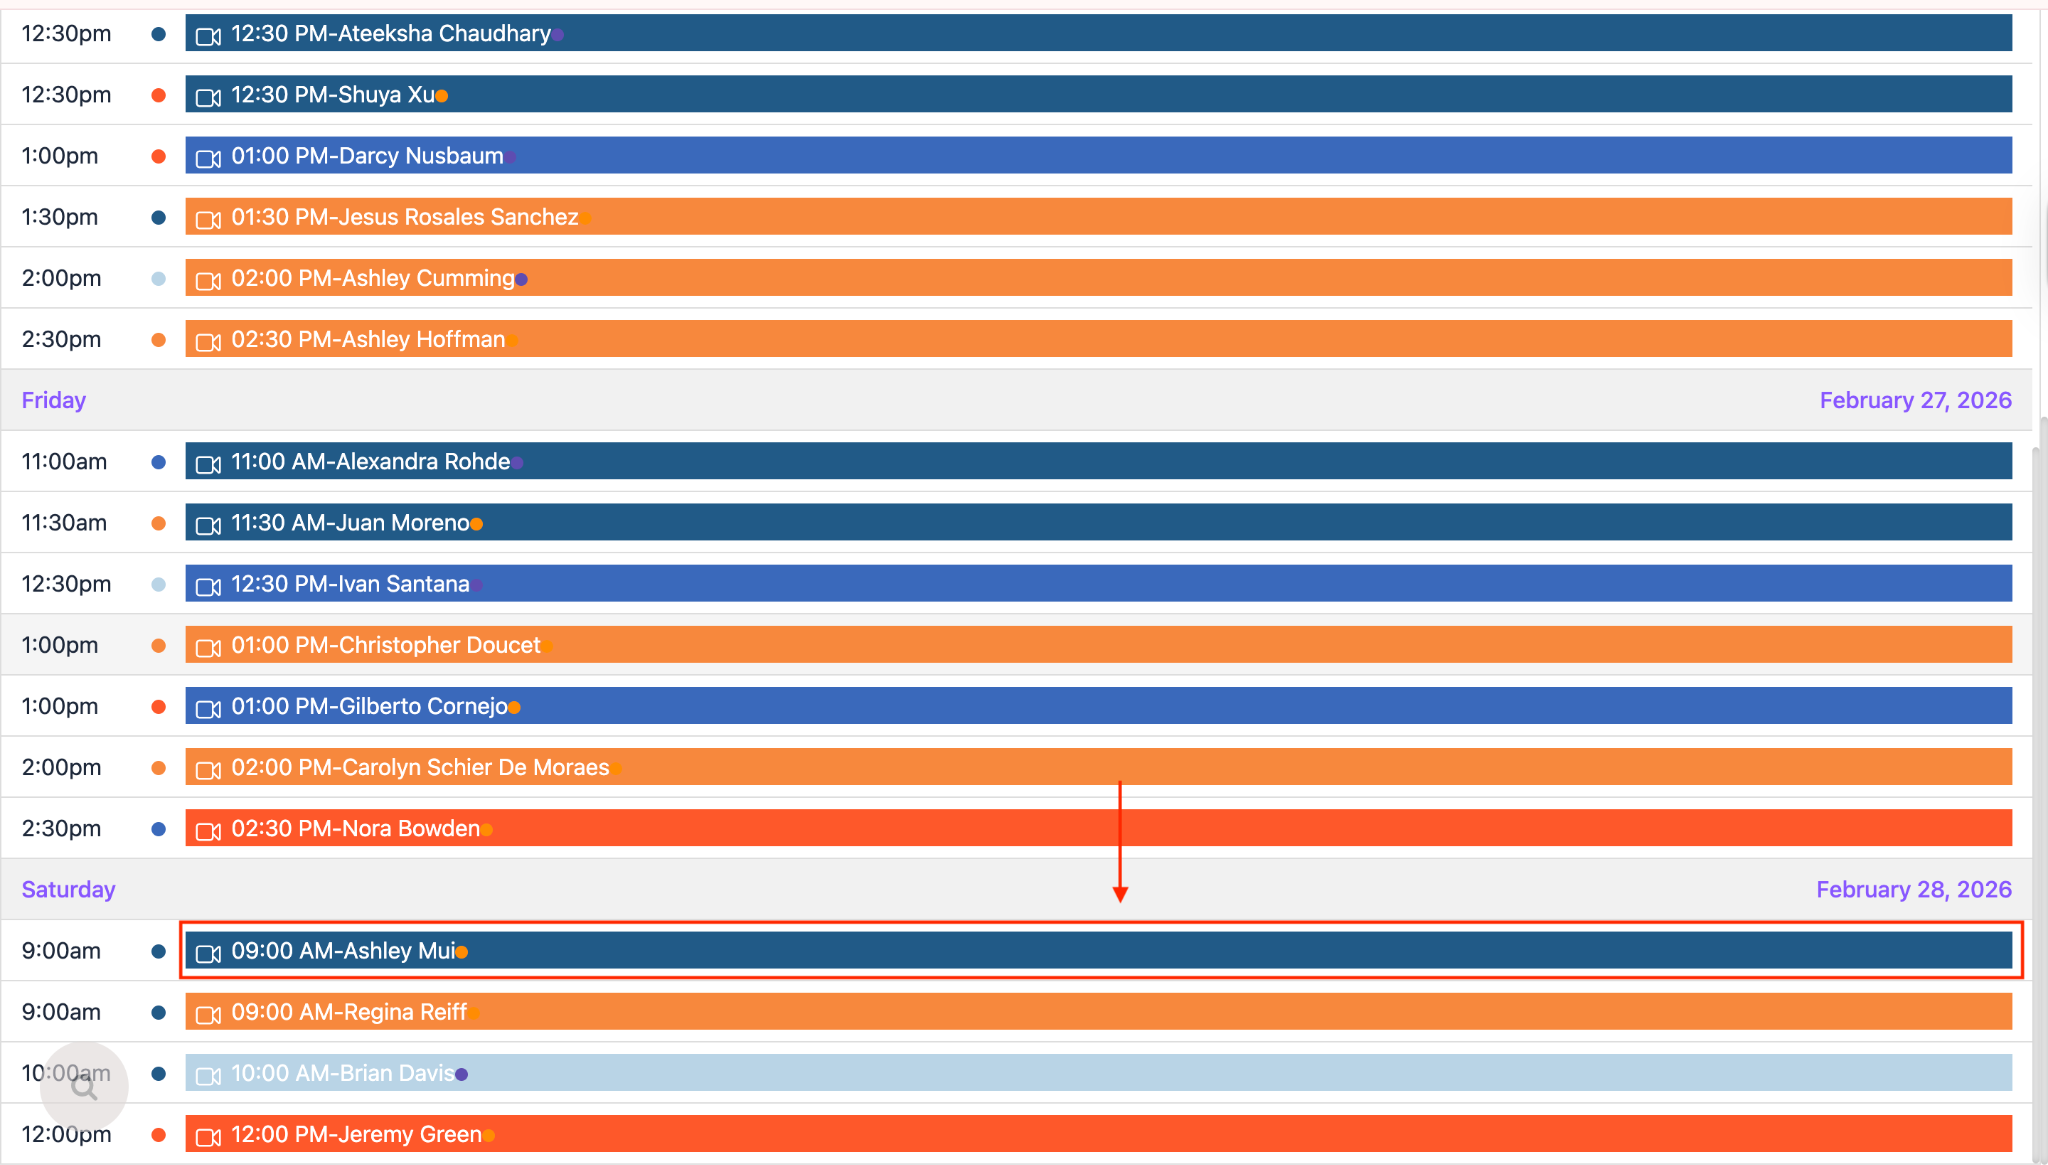
- Here you will see all of the pertinent Patient information for the appointment.
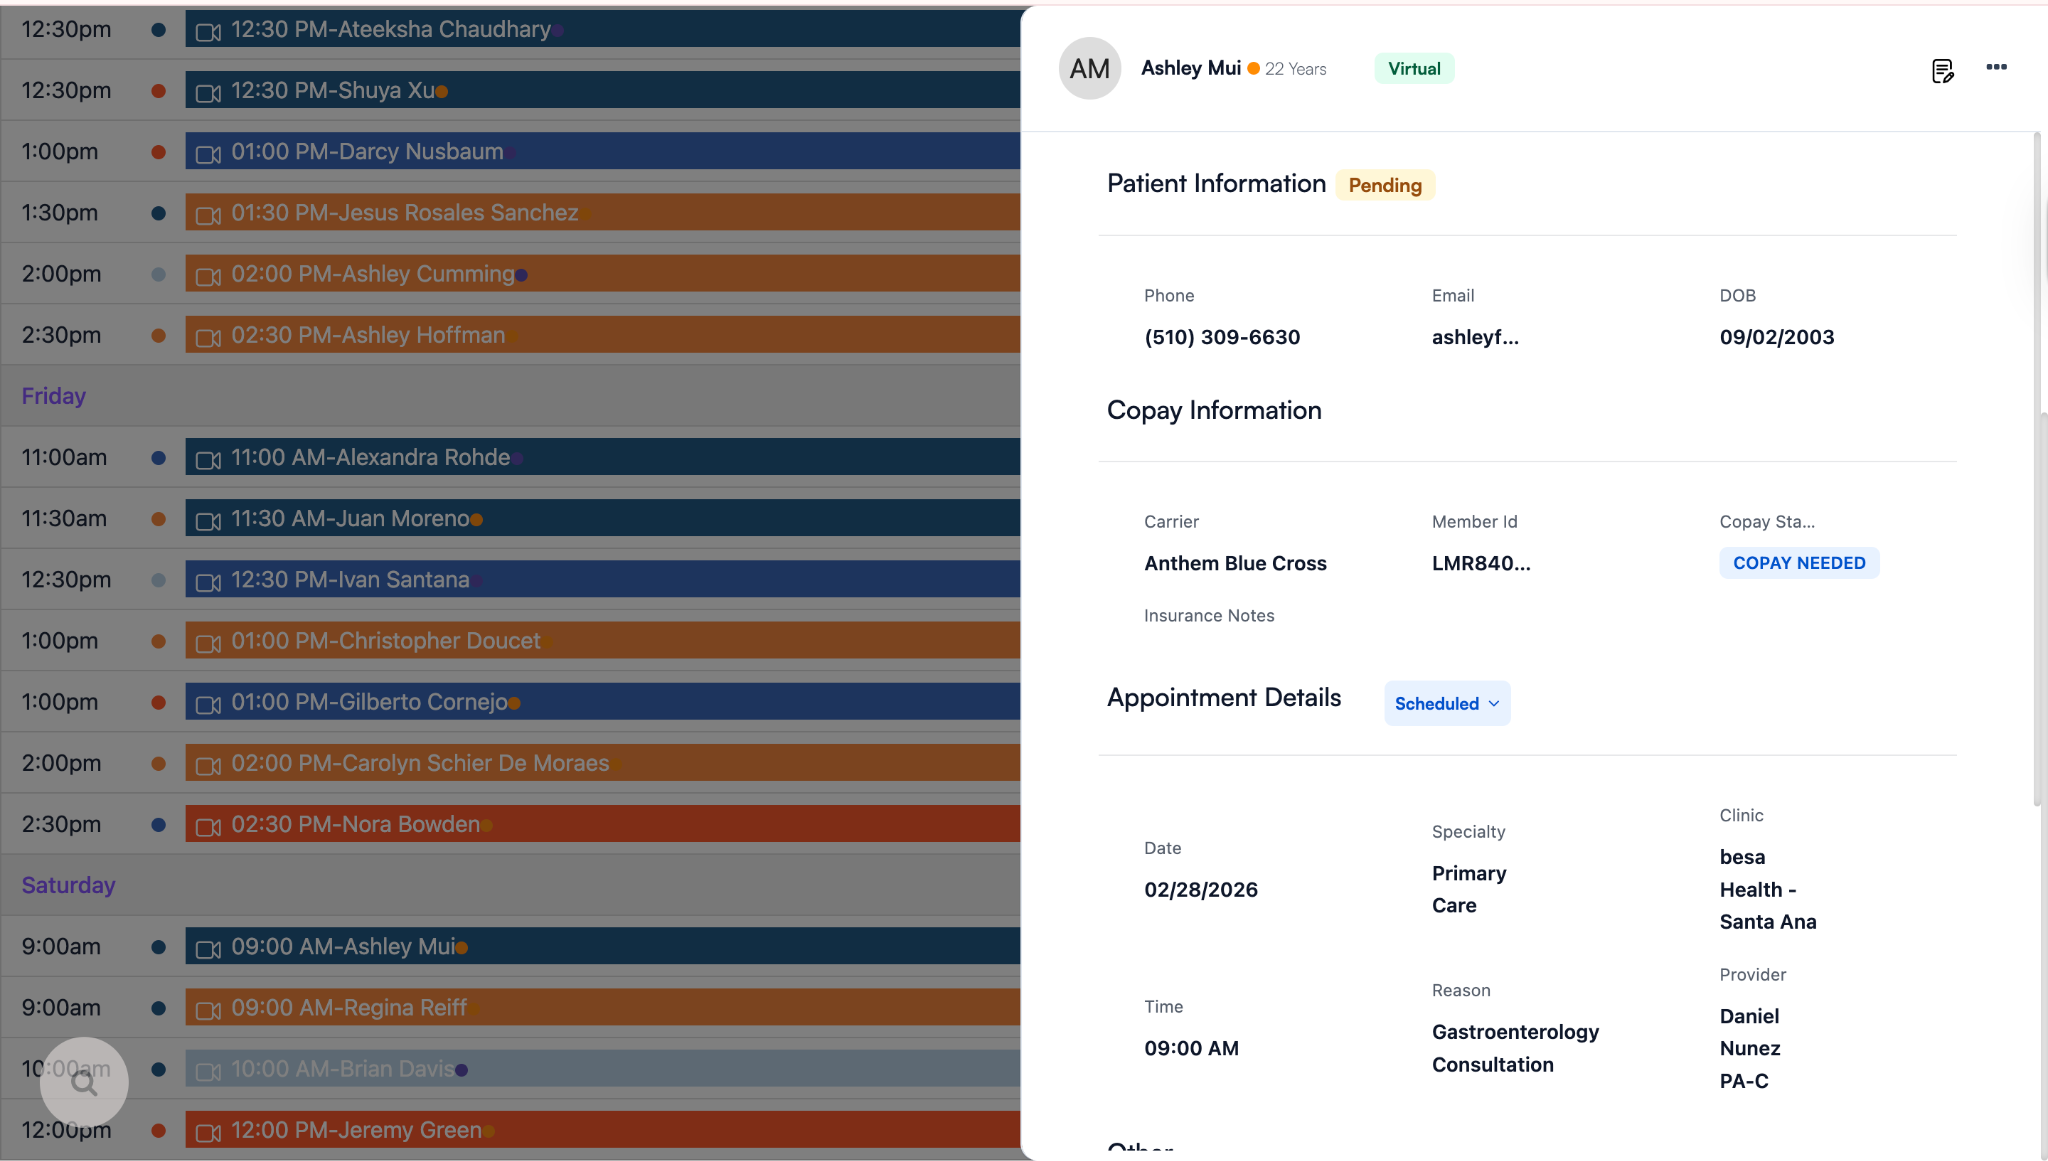
- There are two main things you should be looking for here:
- Copay Status
- Appointment Status
- We always want to make sure the copay is paid before we change the appointment status. You will know that it has not been paid if the copay status is COPAY NEEDED. The Patient will automatically get an email 15 minutes before their appointment to pay the copay. We hope that in most cases this is already covered.
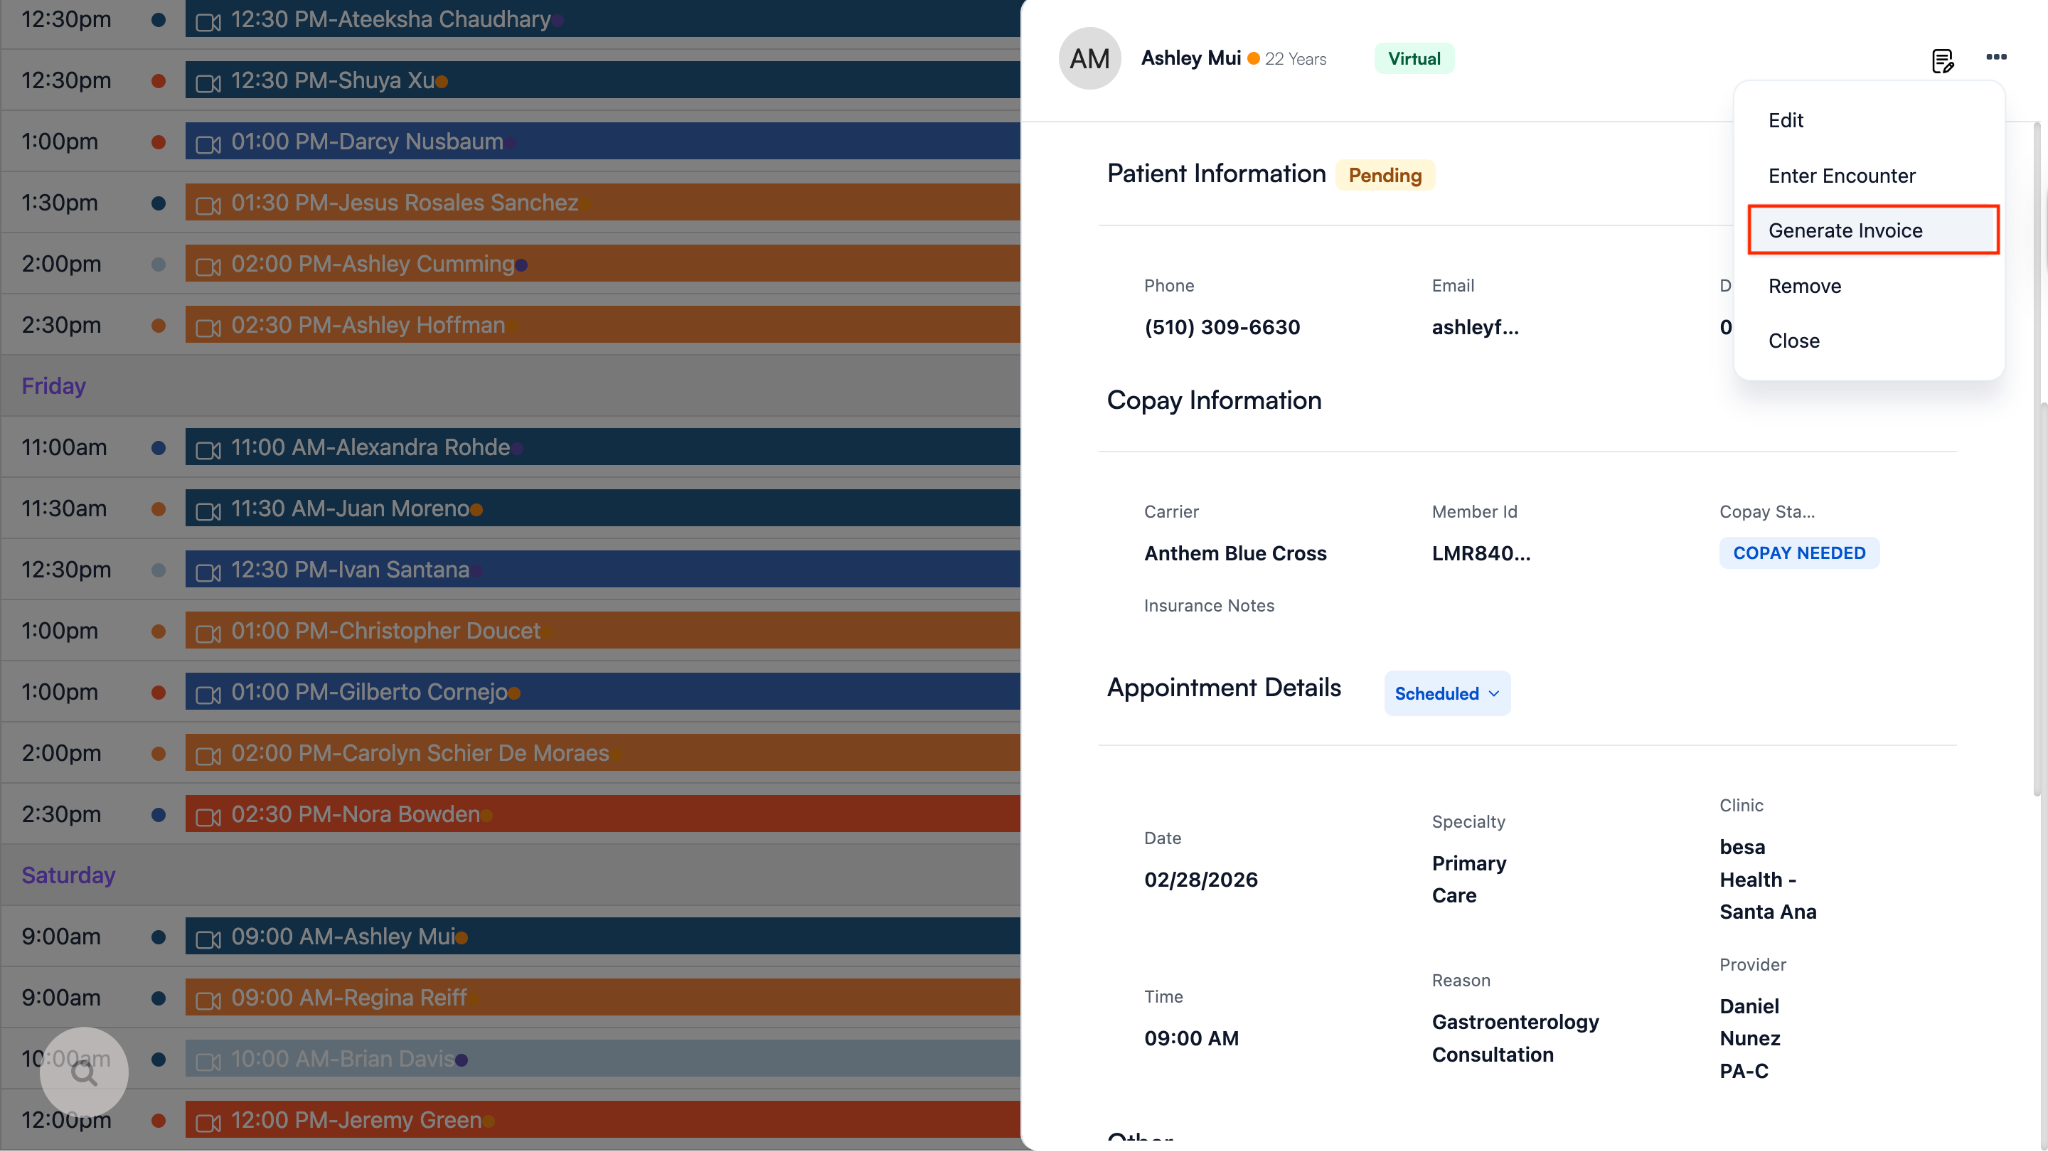
- If the copay has not been paid, click on then action icon and select Generate Invoice.
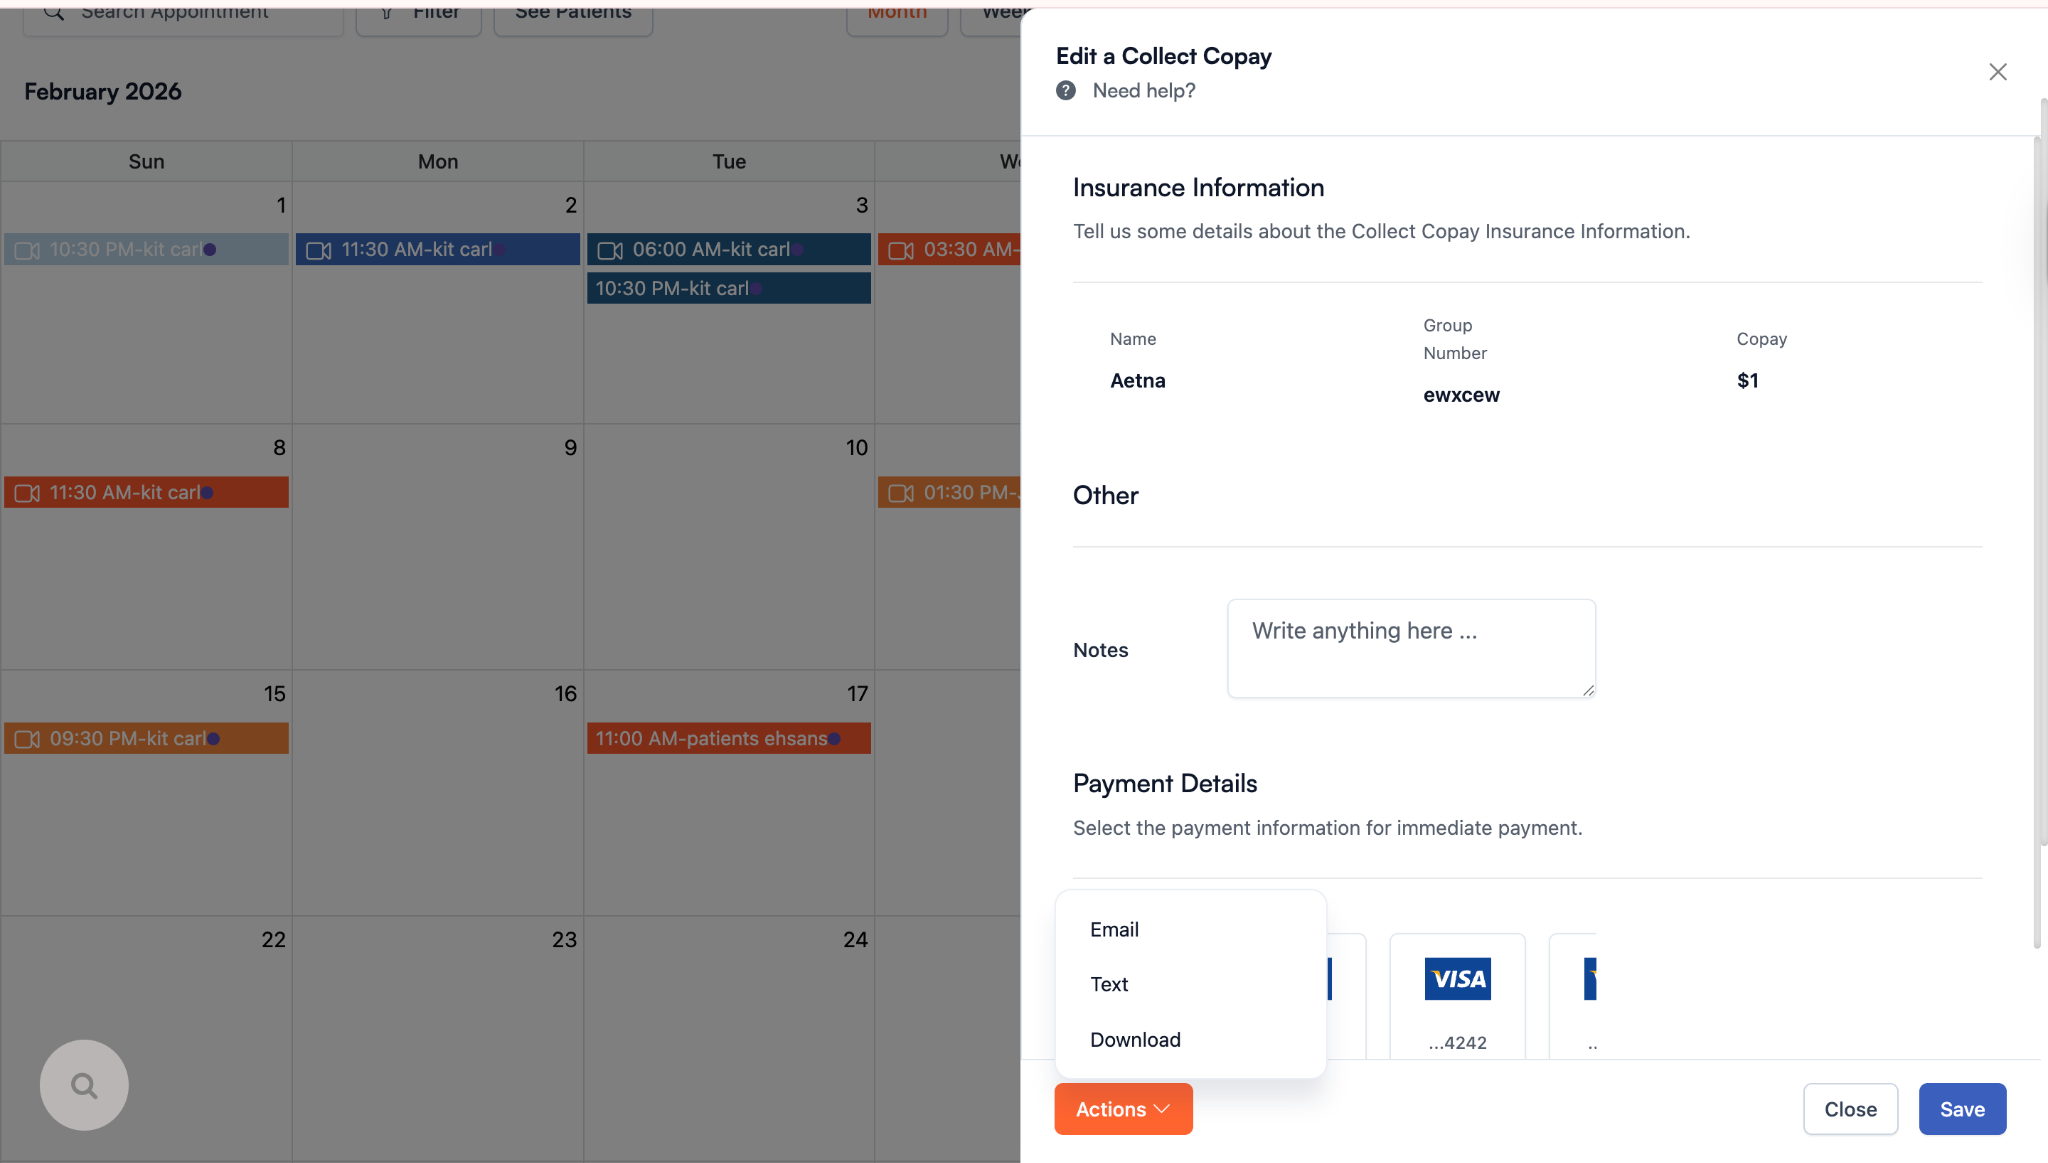
- The edit copay page will slide in. From there, click on the action button > send copay invoice via SMS and/or email.
- When the copay has been paid, you will see the status which says, Copay Paid.
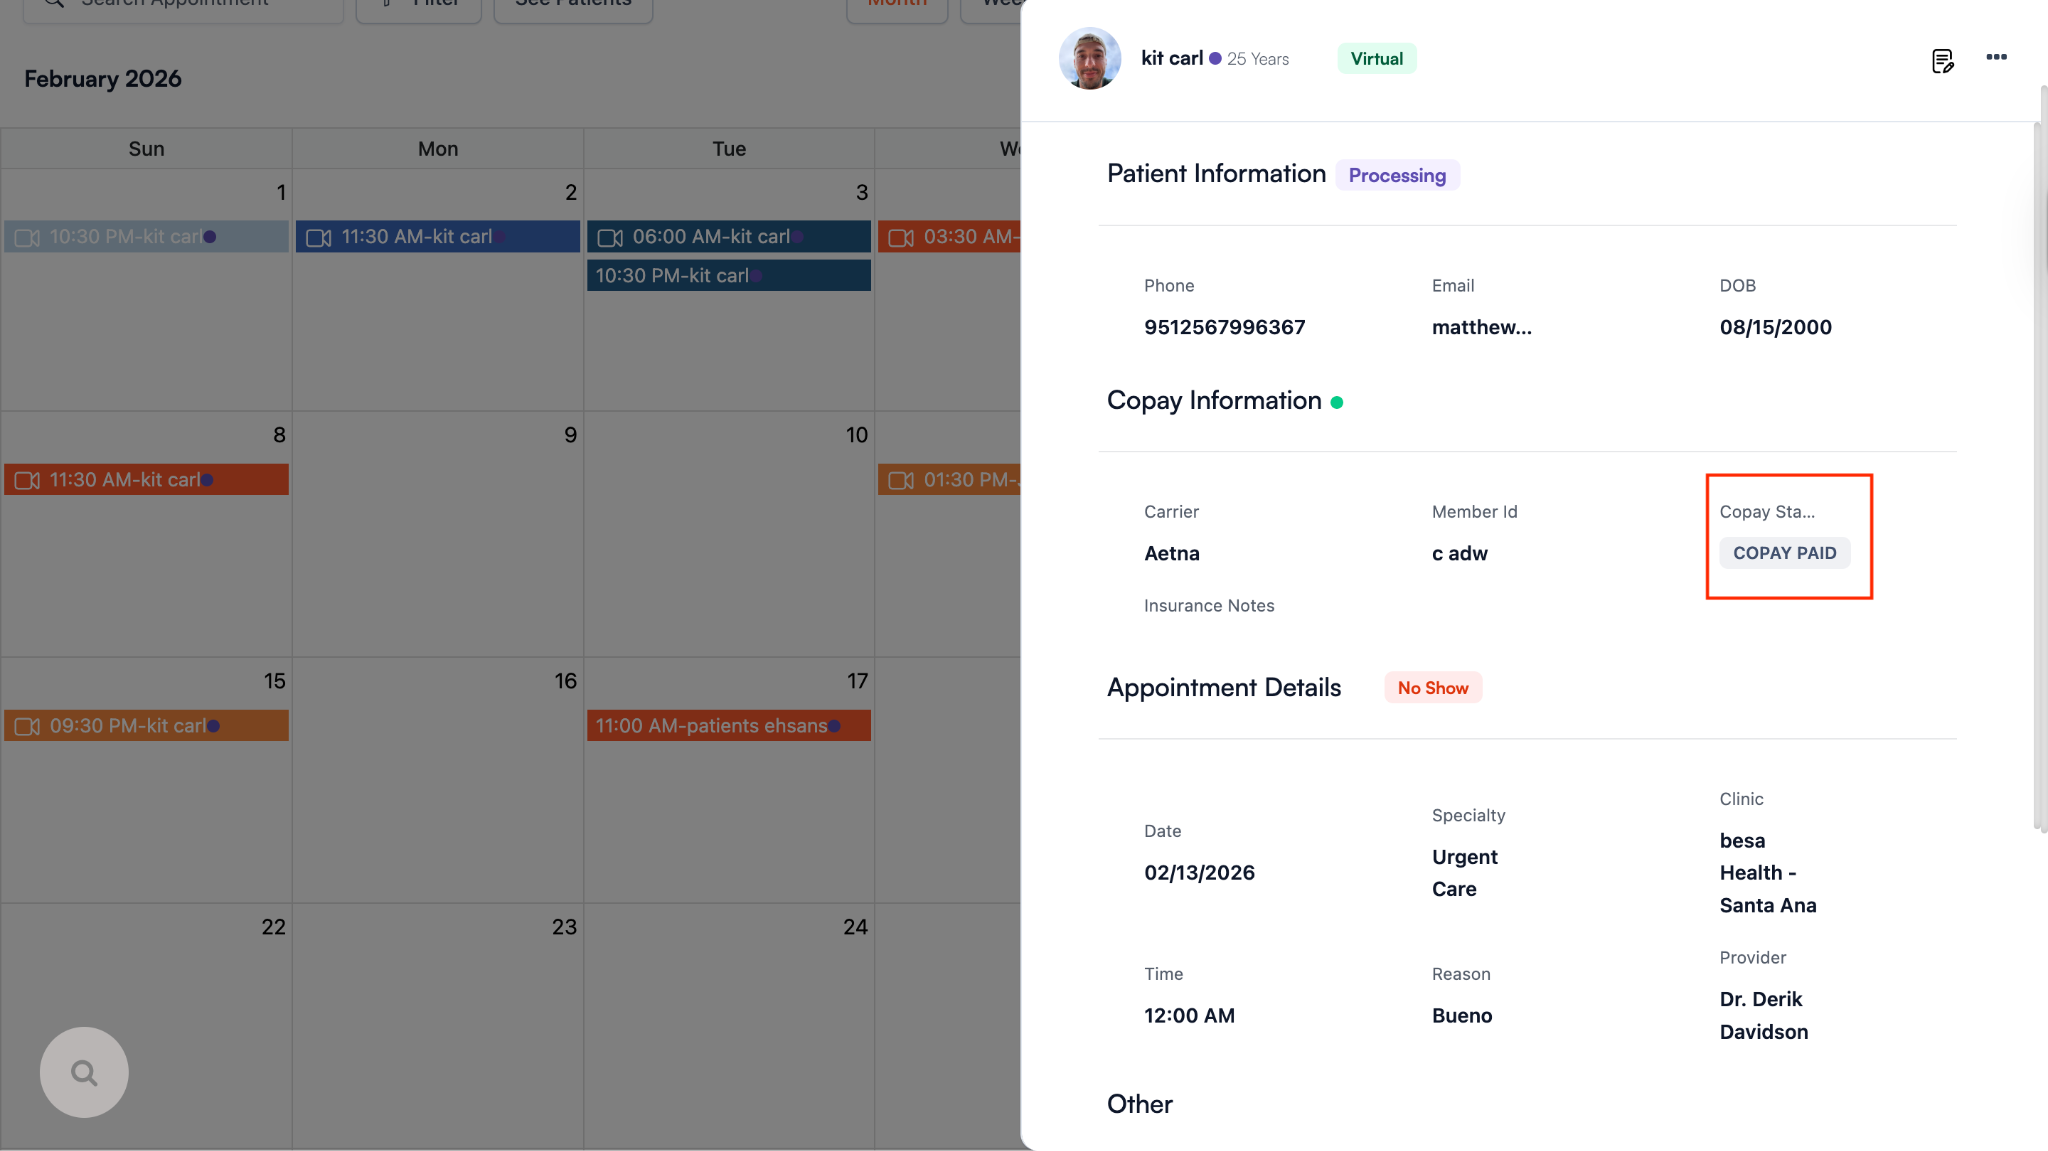
- Now that the copay is covered, we will want to change the appointment status. Typically it will always say Scheduled.
⚠️ 10 minutes after the appointment time, the status will automatically change to No Show.
- To change the appointment status, click on the status tag and select Arrived.
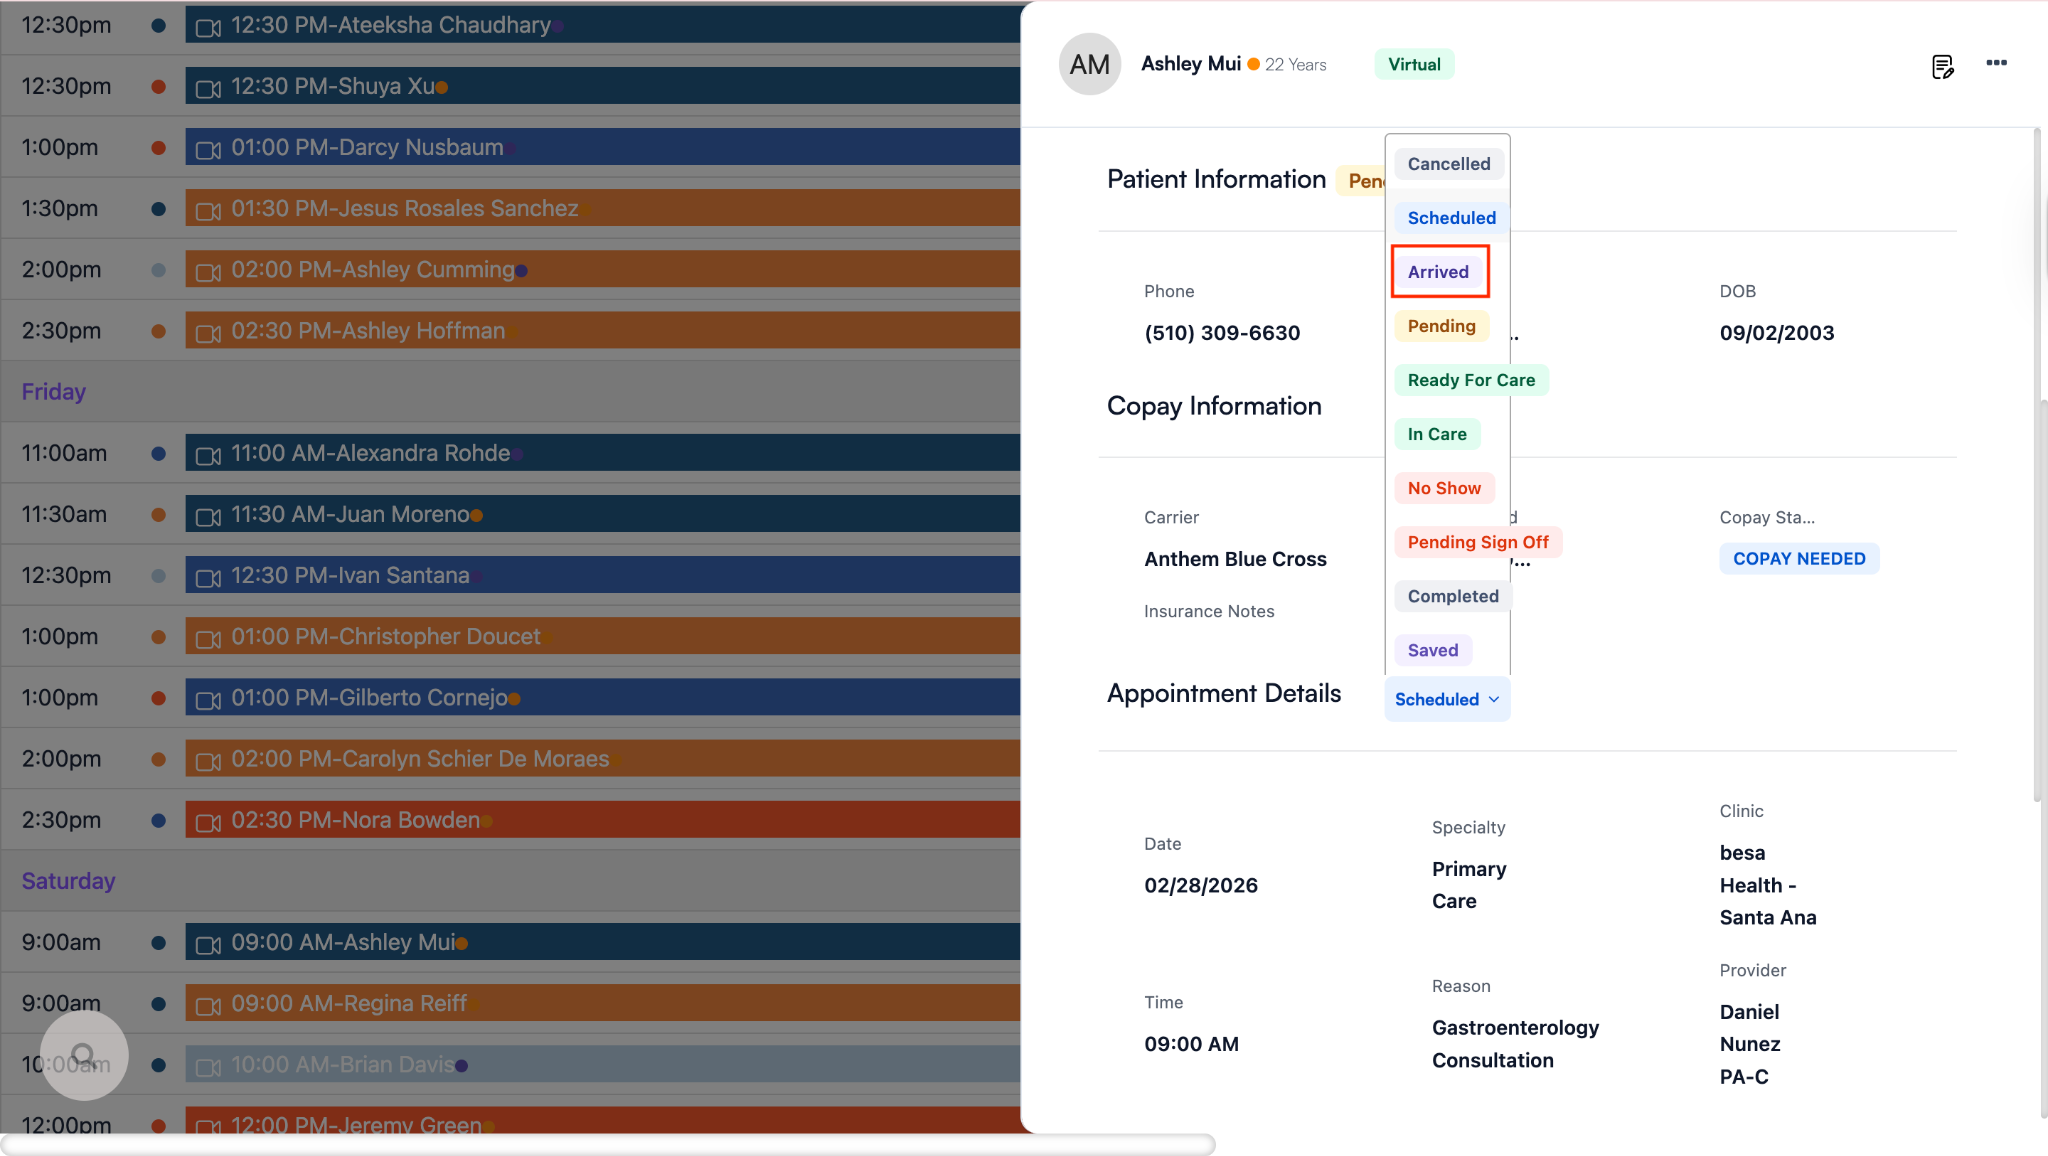
Now the provider will be able to see the status and will be able to get everything ready to see the Patient. Let them know that they will be called to an exam room shortly and to take a seat. If they want a coffee or something they get it for half off by using discount code: Patient. Any Patient who has the membership will have a QR code in their app and that give them a free coffee or tea.
Comments (0)